 We’re heading into the height of harvest time, and gardens everywhere are overflowing with the bounty of the season. At this point, there’s always the question of what to do with all of this fresh, fabulous food.
There is only so much you can eat tonight, right? If you already have completed a marathon of canning, you probably don’t want to see another boiling water bath or glass mason jar till next year. And freezing, while simple enough to accomplish, requires a lot of space and energy, and it leaves you with limited options for later preparation.
So, how else can you preserve those rapidly ripening tomatoes, herbs, berries and zucchini? That’s easy. One of the oldest food preservation techniques is still one of the best: drying.
Dried foods not only store well throughout the year ahead, they’re also versatile and positively delicious. So, in the words of master food dehydrator Gen MacManiman, “Dry it — you’ll like it!”
Back in 1980, when I was seeking healthy snacks for my babies, I bought a food dehydrator designed by MacManiman, an herbalist in Fall City, Washington. The rest, as they say, is history. I’ve been drying my own food ever since.
Getting Started
Buying the right dehydrator is key to a foolproof startup in food drying. Our ancestors relied on wind and sun to dehydrate their harvests, but most of us are working on super-tight schedules these days, and it can be tough to time food preservation with the whims of weather. A good electric dehydrator is virtually trouble-free, allowing you to load it up in the morning before work and safely let it run all day with surefire results.
I am a forever fan of MacManiman’s dehydrators, available at dryit.com. The one I bought more than 20 years ago is still in production, along with an assortment of her other countertop and commercial dryers. I love them because they’re simple, solidly (and attractively) constructed from wood, and they continue to work year after year. Yes, you can buy cheaper machines, but they’re more likely to disappoint. One of MacManiman’s models will likely pay for itself during the first year, providing you with food reserves that are tastier and much more economical than store-bought alternatives.
Once you master the art of drying, you might want to try making your own off-the-grid solar dehydrator (for plans and photos, search “Build a Solar Dehydrator” at rootsimple.com).
Five Food Drying Basics
- Whether you’re working with produce from your own garden or buying from your local farmers market, remember to select the cream of the crop. Look for ripe, firm, unblemished fruits and veggies of the same quality that you would choose for fresh preparation.
- As a general rule, the weight of food will be reduced by a factor of nine after drying. For example, nine pounds of fresh produce yields about one pound when dry, depending on the weight loss from discarded peels, stones, and stems.
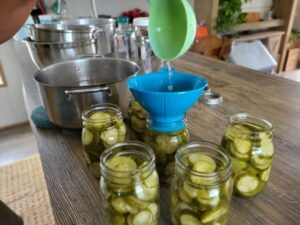
- For easy access after dehydrating, prepare foods so that they’ll be ready for snacking and serving straight from storage. Wash first, then peel if desired, slice, or try pureeing to make chewy fruit leather. Thin, uniform slices that are about 1/8- to 1/4-inch thick will dry quicker and more evenly than thick pieces.
- To ensure even moisture content throughout your food (particularly fruit), it’s helpful to “condition” the pieces before storing. After dehydrating, cool the food completely on the tray, then place in a roomy, closed container that will be kept in a warm, dry location for seven to 10 days. Stir or shake the container once daily so the moisture will distribute evenly. Conditioning also helps reduce the risk of mold growth. (Note: If condensation develops in the jar, there is too much moisture in the food. Return the fruit to the dehydrator for additional drying time.)
- Package dehydrated foods tightly in sealed containers. Try using containers that store meal- or snack-size amounts to keep each portion as fresh as possible. Store in a cool, dark, dry place. Most dried fruits can be stored for one year at 60 degrees F, and vegetables will keep for six months.
(FYI: Gen MacManiman also offers tips, recipes and her “everything you need to know” book about drying food on her website, dryit.com.)
For editorial questions, please contact Clint Hooker at chooker@amuniversal.com.
COPYRIGHT 2011 MaryJane Butters
DISTRIBUTED BY UNIVERSAL UCLICK FOR UFS
1130 Walnut St., Kansas City, Mo. 64106; (816) 581-7500


i wish i had th space to do it
i wish i had th space to do it
i wish i had th space to do it
I have the counter top version my husband and I built back in 1995 and continue to use it most days throughout the year. ?