The first thing we did was look at Pinterest.
In retrospect, that may have been a mistake.
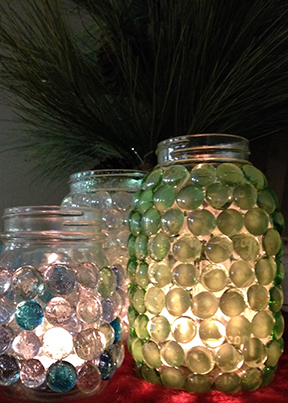
After all, we’re writers and editors here at Country Life, not semi-professional crafters.But we had a great time making our “disco ball jars” as writer Sarah christened the project, and we hope you will too.
This project is a fun re-use for those old jars that are chipped, and won’t seal anymore.
And really, which of us doesn’t have bathtub caulk and a few leftover glass gems around the house?
Once word got around we were doing this project, in fact, people brought us their leftover gems. We have so many that we can probably do a few more jars!
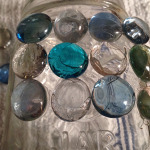
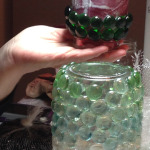
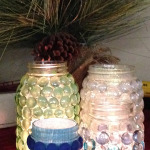
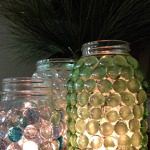
We’ve decided the wide-mouth quart jars are the easiest to use, because you can maneuver inside the jar well, getting the interiors looking just so.
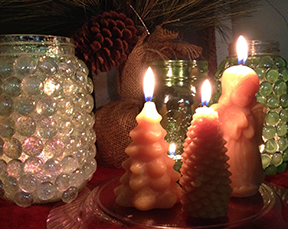
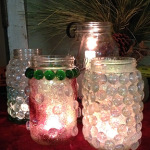
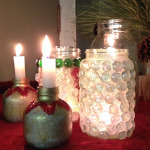
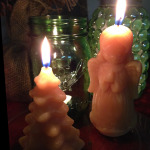
But pint jelly jars are just too adorable, and would make super last-minute handmade gifts. And imagine something like our beeswax pillar candles in the jars. How elegant for dinner!
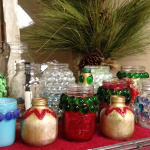
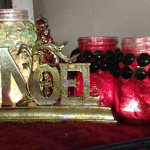
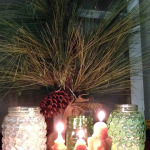
Check out a few of our finished jars, posed just so on the mantle of the fireplace in our lobby.
Our co-workers didn’t really mind working in the dark for a while.
Don’t miss the album below for in-progress pics, and all our crafty handiwork.
Supplies
canning jars: glass only, your choice of size
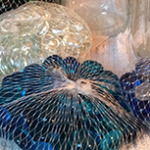
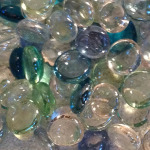
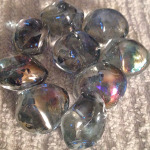
glass gems (we hear the dollar stores are a great source for these in many colors)
clear silicone sealant (Our sources recommended GE Silicone II sealant)
We followed the directions from this project, because we liked the idea that in the summer, we could place these outside too! Really, though, it’s all very simple.
Basic Instructions
Turn the jar upside down. You’ll rest your first row of gems on the glass bump under the jar’s threads. Apply the sealant to the flat backs of the gems. Wait a couple of minutes, and apply gems. (For more details, see the Notes below.)

Notes
Before starting the project, make sure the jars are clean, and free of dust. Wipe outside and inside. We used glass cleaner and lint-free flour sack towels–the homemade glass cleaner works as well as store-bought. You could probably wipe off the gems too, although we didn’t.

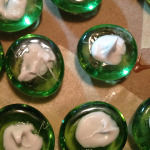
You can apply gems as you like, but we liked “the kiss”, where the silicone mounded up like a candy kiss, and “the spread”, when we used the tip to make a flat dot, spread out like peanut butter on bread. (Sarah was the pro for the kiss application method, and Karen liked the spread method.) Giving the silicone a bit of time to get tacky is key. Otherwise, we found ourselves holding gems on with our fingers until they set, instead of using said fingers for crafting!
As each row sets, add another row. Let completed jar set for 24 hours. Turn right side up, and add tealight or votive candle.
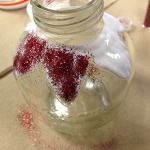
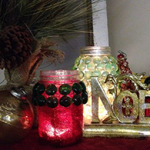
Add color with acrylic glass paint, glitter and ModPodge.
Although you could probably do this with any glass jar, we don’t recommend it. Canning jars are made to withstand high heat. You’re putting a tealight or votive candle in each jar, and although those are small candles, they generate a powerful amount of heat! Stick with the canning jar for this project to be safe.
We compensated with a sand filler in our upcycled “poinsettia” design juice jars, but we weren’t thrilled with the idea of the candles burning down. Best to use the juice jars for show, we think.
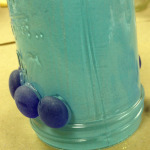
We used ModPodge to add glitter to the insides of our jars and for the poinsettia design on the juice jars. The sky blue pint jar was an experiment with acrylic paint, ModPodge and glitter. We’d recommend thinning the paint down so you get more glimmer when you put the tealight in the jar. ModPodge dries clear, so you can really see the sparkle of the glitter in the other jars that we put it in.
On one of our jars, the matte green one, Karen accidentally used white silicone adhesive. It’s not a deal breaker, and has a nifty look to it. Be aware there are various colors of silicone out there. For the most candlelight, use clear silicone, light colored gems, and good-sized jars with some space between the stones.