
Question:Â What do saved yogurt cups, a kitty litter pan and plastic kitchen trash can liner bags have in common?
Answer:Â They’re a frugal gardener’s way to get seeds started in any sunny window!
If you’re in the northern hemisphere, the seed catalogs, nursery stock lists and orchard supply magazines have started filling your mailbox. Everything from heirloom seeds to herb specialties to antique rose offerings have been piling up on a table next to my wing-back chair near the fireplace; and hardly an evening goes by, when I don’t get out a pad of graph paper, and find myself imagining walking between row after row of healthy veggies, flowers and herbs waiting to be brought inside or just enjoyed in place for their fabulous color and fragrance….
Ahem…yes, well, <sigh> it’s January. But y’know what? If you’ve got a sunny window or two, you can start right now (well, as soon as you’ve collected a few materials and have at least a couple of those precious seed packets) and get a start on this year’s garden. To begin, get out those dozens of yogurt cups you’ve washed out and saved so diligently, and find a way to poke or melt (as with the tip of a soldering iron) a few holes in the bottom of each one. Think in terms of smaller cups for things you’ll start later that won’t wait as long to go into the ground vs larger cups for things that can get bigger and maybe even a little leggy before they get planted out and need a good root system.

Next, think about your potting mix. A good seed-starting mix typically isn’t real dirt, which can hold moisture and often supports mold or other organisms that can hurt baby plants. The one I’ve used is an old formula from an organic gardening book:
- 1 part perlite
- 1 part vermiculite
- 1 part peat moss
In recent years, there’s been some ethical question around using peat moss, but you’ll no doubt use your own best judgment. Heaven knows there are good commercial potting mixes out there; but if you do decide to mix your own, I’ve found that the most efficient way to mix a good-sized batch is in a garbage bag. The bigger the batch, the bigger the bag. You can twist the top, tumble & turn it and plunge your hands into it, mixing to your heart’s content until it’s well blended.
Next, line your empty cups up in a clean kitty litter pan. One or two pans that can be supported in front of each window, each holding anywhere from 12 to 16 yogurt cups, is a lot of seeds! Before filling each cup and putting a seed or two in each, label the cup with a marker pen. I thought I was being very clever one year, labeling the end of the litter pan with an entire row, but when I needed to turn the pans a half, then half again a week or so later, things got very turned around (pardon the pun) and I ended up planting an herb where lettuce was meant to go, and then pulling it out of the ground because I thought it was an invading weed!

Once your pan or pans are filled with labeled cups with their seed-starter and plants-to-be, slide each pan into a clean kitchen trash can sized plastic bag. Many are white but some are clear – either works well. You just don’t want to use anything dark at this point — you want both light and humidity/draft protection — in fact, what you’re creating is a flexible greenhouse! Your litter pans-cum-greenhouses are then placed on a secure surface in front of a window that gets at least 4-6 hours of sun or bright indirect light each day, and before you use a clothespin or big paper clip to close the bag, you’ll use a funnel or narrow-neck watering can to verrrrrrrry slowly pour lukewarm water into the litter pan at one corner.
Try your best not to pour any water directly on your little cups — you want them to absorb the water from the bottom through the holes in the cups. This may take a couple of return visits, and when you first start, the cups may behave as though they want to float. Have patience, pour just a little in at a time, and come back & water every ten minutes or so until you have a half-inch or so that does not get absorbed. Leave the bag closed (but not super-tightly sealed) for a few days and check for moisture. You’ll probably have to water anywhere from every three to five days, and you’ll want to rotate the litter pans 180 degrees each time you do.

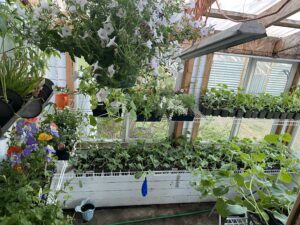
I don’t think I’ll ever forget the first time I started a half-dozen pans. At the time, I had three big south-facing windows, and I put big boxes in front of each to support two litter pans per window. I had done the watering routine two or three times and then forgotten about the seeds for more than a week. When I remembered, I went running up the stairs, certain I had killed my chances of having a garden that year (not to mention the seeds); but instead, the look of healthy, green leaves and stems pressing against the bags, pushing them up and inflating them like balloons brought tears to my eyes. Opening those bags was like a breath of summer — warm, humid and filled with scent of green — all in March!
When your seedlings get to this point, it’s time to slide the trays very gently out of their greenhouse bags and let them adjust to the room and the usual movement of air. This is the first step of their transition toward being ready to go outside. If they’re to be repotted into something bigger in the interim, wait a day or so to give them a chance to get their sea legs and even then, be extremely gentle with the repotting process. Once temperatures outside get to around 60 deg F you can start putting the trays outside for a while each day (not in direct sunlight, please!) so the plants gradually “harden off” or acclimate.

One of the challenges of starting your own seeds is the timing. I’ve let my enthusiasm for getting tomatoes going take over my common sense and had vines that were so leggy, that by the time I was able to take them out to the garden, I had to bury all but the top three or four leaf-sections. At other times, I started herbs a bit too late so that they had to remain in large landscape pots all summer under cover because they’d have burned if I put them out when they were actually the right size.
For all but the seasoned gardener, starting seeds is often a learning process by trial and error; but the good news is that with the exception of extremely rare seeds, the plants you’ll be starting will be far less expensive than an already-started seedling of the same cultivar. You’ll also have a wider variety of things to choose from, and can start some of the more frail things that don’t travel well, as well as unusual plants that are almost never available for the commercial market.
As the wind blows another snow storm into my part of the mid-Atlantic, I’ve refilled my firewood box from the stack on the back porch, cut a basketful of kindling, parked my car adjacent to where the tractor waits with its front-loader facing down so as not to collect a load before it’s started, and I’m thinking about the wonderful community of people we all share our stories and skills with. I wish you all warmth and wellness,
Sherry


We received this comment via email:
Please tell Sherry Ellesson, I truly appreciated her column on starting & planting seedlings! This will be my 1st attempt, so her article was very helpful!
Thank you
Pam Dennis