Part I: Art Meets Science
If I were to tell you I spent the weekend arranging for the reversal of esterification, or more succinctly, hydrolysis of esters by a base, would you know I was talking about saponification? For those of us who promptly forgot everything we learned in Organic Chemistry as soon as final grades came out, none of these terms are exactly household words. But for as long as people have been making soap, combining fats or oils with a base such as lye, they’ve been employing this amazing chemical reaction and have, over time, turned what was once a basic, no-frills cleaner for everything from bodies to laundry, into a lovely and infinitely varied luxury.
While all soap does in fact do the job of cleaning, facial and body soaps can also be formulated to soothe irritated skin, scrub a gardener’s hands, refresh a sunburned face or pamper a baby’s skin and hair – all with adjustment of the proportions of a dizzying choice of oils and additives. For the first part of this article, we’ll look at a very small batch of soap, using Sandy Maine’s recipe* that can be poured into cutlery dividers and made easier to handle and cut for the beginner. We’ll talk about what to do, when, and what to avoid doing (with a rather graphic picture of the result!). I should say here that if you are thinking in terms of the nearly-instant gratification of glycerin soap “melt and pour,” this may not be the creative outlet for you.
From the initial measuring of ingredients, to the mixing and stirring (for what can amount to hours) to finally pouring the still-liquid soap into molds for its two days of congealing, this is a process that can easily take a full day, and once the soap comes out of the molds and is to be cut, anywhere from three to six weeks of curing are required as the residual moisture in the bars evaporates out. That said, if you enjoy activities that are meditative in nature and allow you to put a lot of yourself into their success, by all means, read on.
One of the most important things in soapmaking is to have everything ready right at the beginning. All chefs and most cooking enthusiasts have come across the French phrase mis en place. Literally translated, it means put in place, and it is among the most helpful habits to develop if you decide you like soapmaking enough to make it a hobby or even a full-time enterprise. To begin, assemble the following and make sure everything is clean and dry:
- A 12-qt or larger stainless steel or enamel stockpot
- A long-handled stainless steel or wooden spoon
- A heatproof half-gallon pitcher (you’ll see a lesson sadly learned about this one)
- Two cooking thermometers
- A scale that can accurately measure ounces
- A measuring cup, preferably glass
- Rubber gloves and goggles (yes, it’s important)
If you have any sort of respiratory difficulties, I would also suggest a dust mask or even a lightweight respirator for use during the initial mixing of lye with water. It’s also a good idea to keep a bottle of vinegar nearby. Should you splash any of the caustic solution on yourself or a surface, rinse the area well with water and then apply some vinegar to neutralize the strong caustic (base) action.Measure out and melt in large pot on very low heat:
- 24 oz olive oil (light is fine)
- 24 oz coconut oil
- 38 oz vegetable shortening (plain, not “butter flavored”)
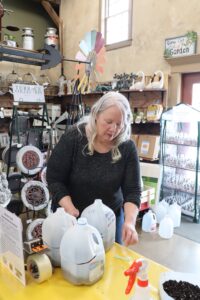
While the solids are melting, grease your molds – I used six cutlery dividers here – and then measure out:
- 32 oz distilled water into your heat-proof pitcher
. . . and in a separate container: - 12 oz dry crystalline lye
The picture of what can happen using a pitcher that isn’t heatproof speaks for itself. Less than five seconds after adding the lye to the water (never do it the other way around) and giving it a stir, there was a loud snap and I was glad I had set this up outside and that we had made sure none of our pets were nearby. After being hosed down thoroughly and given a generous splash of vinegar for good measure, the deck was ready to try again. I make it a practice to mix my lye solution and allow it to cool down outside, as the fumes that are released are choking and not anything I’d want in the house. It is also imperative that animals and children are kept away from the area anytime lye is being opened, measured out and especially, mixed with the water.
At this point, your fats have probably melted and you can turn off the heat. It’s helpful to have two thermometers so the fat/oil pot and the caustic solution can be watched as they cool down. If the fats have cooled to less than 90° Fahrenheit by the time the caustic solution approaches that temperature, warm them up just a bit. What you’re aiming for is both mixtures being at between 90°- 95°F, at which point you very slowly and gently pour the caustic solution into the large pot of fats. Keep in mind it’s still pretty strong stuff even though it has cooled, and immediately put it into the sink and run a gentle stream of water in it until it overflows (avoid splashing).
Now the gentle, slow stirring begins. I have a wooden spoon that I use strictly for soapmaking, and I like the way it sounds as I drag it along the bottom of my big enamel pot, but that’s strictly personal preference. At this point, some folks get out a stick blender and shorten the time to “trace” by a whole lot, but I’ve never been as satisfied with the results when I’ve done that, so I do all my stirring by hand and enjoy the process. After my second or third batch of soap many years ago, I discovered I do some of my best thinking while I’m making lazy eights in the soap batter, so I’ve taken to keeping a pad and pen nearby to jot down ideas.
While we’re stirring, let me give approbation to my source for the above recipe. This is from The Soap Book, a smallish soft-cover book by Sandy Maine, who was the founder of Sunfeather Herbal Soap Company. I have also had success with numerous recipes from Norma Coney’s The Complete Soapmaker. Her recipes are for larger batches, and the one for an entirely olive oil soap took a full eight hours of stirring. I was somewhere between exhausted and hypnotized by the time I was able to pour the eight pound batch into one of my large wooden soap molds, but the soap it produced was silky and delicious to use.
That said, the above batch took just about one hour to reach that magic stage the soapmaker eagerly anticipates: “Trace.” This is when the mixture almost magically goes from being somewhat translucent and dark-colored to a light, thicker, homogeneous sort of batter and a spoonful drizzled over the surface leaves a trace and sits atop the mix before finally melting back down level.
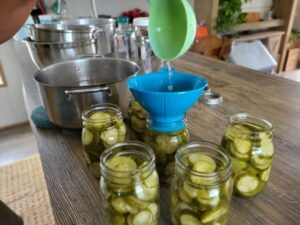
At this point, if you wish, you can add up to 4 oz of either essential oil or fragrance oil and mix it in before pouring. (This would also be when you would mix in any additional ingredients, but we’ll cover those in Part II. For now, this being your first batch, keeping it simple wins the day.) For my batch, I decided to make one of my favorites for fall – rich, earthy Patchouli with just a whisp of Coriander seed. Once it’s thoroughly mixed in, the batter is carefully poured into the molds, which have been hooked together on a large cooling rack.
The batter is now taken to a place where it cannot be disturbed, covered with cardboard and then wrapped in a thick quilt to hold in the heat. It will remain there for two days, at which time it is turned out of the molds and cut. It is then spread out on either screens or cardboard to cure, while the pH of the soap decreases and the residual water evaporates. I’ve found that three weeks is about average for this process, but I had one batch that was so superfatted and drenched with therapeutic essential oil it took closer to three months to harden!
In Part II, we’ll look at not only such techniques as superfatting, but “filled” soaps, colorants, rebatching, and embellished soaps. Have fun and good luck!