
You’ve had a successful hunt. You have carefully field dressed and cared for your meat. The choicest cuts are wrapped and frozen. Tenderloins are just waiting for that perfect marinade. Jerky has been seasoned, dried and ready for snacking on the next outing. So what else is missing? Home canning.
There are several reasons I have grown to love canning the venison and elk that my guys bring home:
1. Canning frees up freezer space for other things.
2. Pressure canning can make the less tender cuts versatile.
3. Home canning meat means jars of meat on the shelf ready to go at a moment’s notice. No defrosting time. Ever tried to defrost an elk roast quickly in the microwave because you forgot to take it out earlier? Doesn’t work so well. (Ask me how I know!)
4. The best benefit? My guys love it. We are an active hunting family with 4 sons. Much of our meat is provided by the men of hunting age in our family.

Do you know just how easy canning venison can be? When I started checking into home canning the wild meat my guys were bringing home from hunting camp, I was surprised at just how easy it was. Cut it up, put it in a jar and pressure can it? Surely there is more to it than that!
Well, there is a little bit more…. but not much!
These are quick directions for an easy raw packed method for canning venison.
1. Slice the meat you choose to can across the grain into strips about 1 inch thick. Then cut these strips into chunks the size you desire. Cubed is a convenient size or you can cut the length of the jar.
2. Place your chunks of meat into hot jars. Leave a 1-inch head space.
3. Add canning salt or other seasonings if desired. 2 tsp salt per quart is a good amount. You can also layer onions into your jars with your meat. Or add some garlic or bouillon. These additions are for flavor and are optional.
4. Do not add liquid. This was the hardest part for me to get. You really do not add liquid. The meat will produce its own juice.
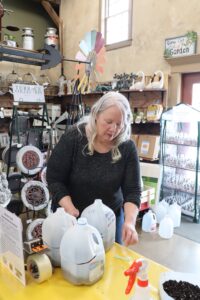
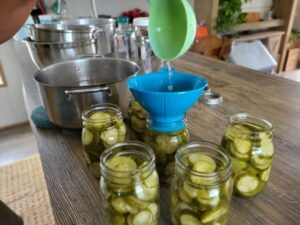
5. Wipe the rims of your jars clean with a damp paper towel or cloth (as shown in photo above). Place warmed canning lids and screw bands on the jars. Place filled jars in your preheated pressure canner.
6. Follow pressure-canning instructions. For altitudes less than 1000 feet process at 10 pounds pressure. Process Quarts – 1 hour 30 minutes. Process pints – 1 hour 15 minutes. Don’t forget to adjust the pressure requirements for your altitude. This is important! — For safety you really MUST use a pressure canner and you MUST use proper pressure for your altitude. See this page on my website, Simply Canning, for more details.
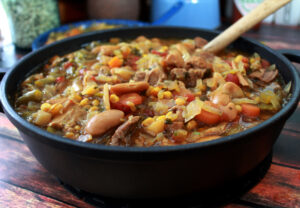
Use canned venison or canned elk in stews, meaty soups, and even chili. You can use it to make Sloppy Joes and killer Enchiladas.
For more canning and preserving supplies from Lehman’s, click here.
Enjoy your venison!
Editor’s Note: This post was first published in October 2010.











[…] italian "beef", "beef" stew….. The meat has great flavor and is very tender. Canning Venison: Another way to preserve your wild game | Lehman's Country Life Robin My Pinterest Page of the Quilts I've Made: […]