When I was little, my mother made pickles in crocks. It seemed like a lot of work with many steps to finally get to a tasty pickle. I recently found out that what she was doing was fermenting the cucumbers and that it’s not hard to do! And in the last couple of weeks, I have gone from thinking probiotics were just capsules or something in special yogurt to making my own sauerkraut. How did I not know that lacto-fermented foods are good for you?
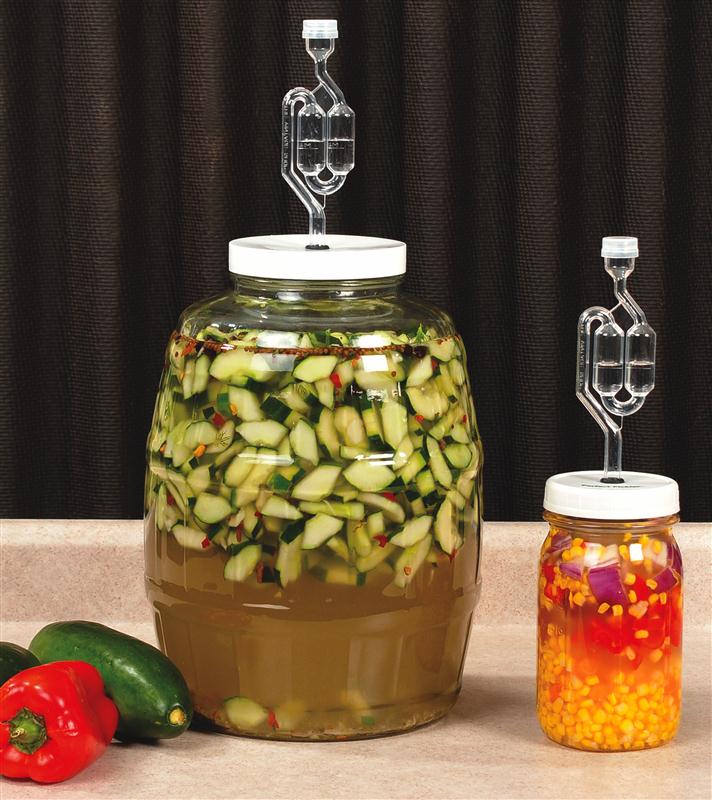
Airlock fermentation systems like the Perfect Pickler™ are attractive, but to stay within my budget, I created my own. Here is what you can do to make your own airlock fermentation system.
Make Your Own Airlock Fermentation System
-

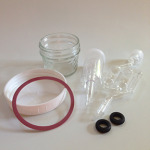
Small Mouth Plastic Storage Lid; also available in Wide Mouth. At Lehman’s in Kidron, Ohio, and at Lehmans.com. Gather the following supplies:
- Airlock (either the S-Bubbler or the Three-Piece will work, see note below for sources)
- Food safe rubber grommet
- Plastic wide mouth canning jar lid
- Rubber or silicone gasket
- Wide mouth canning jar
- 4 ounce jelly jar
- Drill
- Drill bits (several sizes with the largest being ½”)
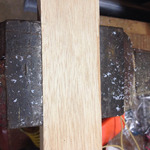
- Piece of scrap wood
- Small clamps
- Box cutter (if needed)
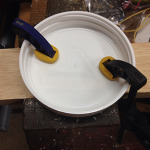
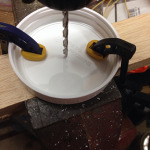
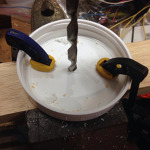
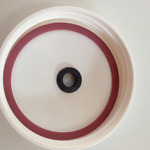
2. Drill a ½ hole in the middle of the plastic lid.
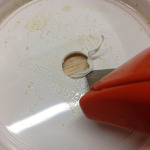
Put the scrap piece of wood in the vise then clamp the plastic canning jar lid onto the wood. Fit the smallest drill bit (about 1/8”) into the drill. Position the bit near the center of the lid. Slowly drill into the plastic, creating a small pilot hole. Repeat with two more drill bits then finally with the ½” drill bit, positioning the drill bits into the pilot hole. Be careful to drill slowly, especially with the larger drill bits. It is very easy to crack the lid. If some of the plastic shavings stick to the final hole, pry them off with the tip of a box cutter.
3. Assemble the lid.
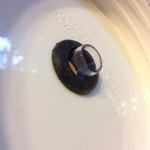
Before you begin to assemble the system, be sure to wash everything thoroughly. Insert the rubber grommet into the hole, working on both sides of the lid to make sure the entire grommet fits into the hole. If your gasket fits snugly into the lid, insert it now. If not, you’ll have to place it on top of the jar when you screw on the lid. Insert the airlock fermenter assembly into the hole, pushing it into the grommet until the tip extends about ¼” from the grommet.
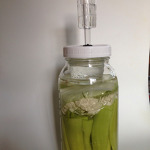
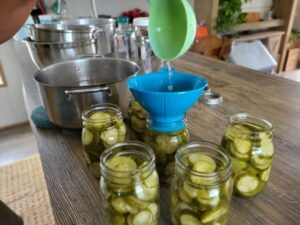
4. Assemble your jar.
After you have filled your jar with vegetables, place strips of carrot or a cabbage leaf over the vegetables to prevent them from floating. But you need to make sure to allow space for the CO2 to leave the brine. Fill with brine, covering the cabbage leaf plus one inch. Be sure to not fill abve the shoulder of the jar. Place the jelly jar on top of the cabbage leaf. This helps hold down the vegetables and allows for some overflow if the brine level increases. Pour some brine into the jelly jar for additional weight. Fill the airlock fermenting assembly with fresh water, making sure to only fill to the “max” or “fill” line. Be sure to add the gasket on top of the jar if it does not fit snugly into your lid. Screw the lid on securely.
- Check for leaks by gently pressing down on the lid. Watch this video (4:18 – 8:25) to see what to look for.
Photo Album
Here’s a step-by-step photo album. I hope it helps you make your own fermenting jar!
And a note from Beth
When I explain it, it all sounds so easy. Get a lid, drill a hole, right? Sometimes, it’s not. For instance, I bought an eight pack of lids, and:
- 3 – turned out fine
- 1 – had to fix a crack in lid with electrical tape
- 1 – might be salvageable if I re-drill (It started to break apart like the others, but last night I realized that the hole is still smaller than the 1/2 hole I need.
- 3 – totally shattered, beyond hope
I used the following resources when making my airlock system. Have fun making yours!
http://www.seasonedhomemaker.com/2012/10/how-to-make-your-own-fermenting-jar.html
http://www.probioticjar.com/pack-the-jar.html
http://www.youtube.com/watch?v=4WMc0xDbEbo (This video is a beer making video, but pertinent airlock information can be viewed from 4:18 – 8:25.)


[…] 1. How do I make a DIY Air lock lid? […]