 There is nothing quite like the harvest time, but some fall seasons can bring an embarrassment of riches. Not so long ago, the neighborhood where I live was one of California’s premiere apple growing regions. Even though most of the old farms have given way to more lucrative wine grape cultivation, the months of October, November and December still bring thousands of pounds of fresh local apples to the marketplace.
The familiar popular varieties are all there – your Fuji, your Rome, your Delicious (red and golden), your Granny Smith – but who among us knows the delights of the Bellflower? Or the Star-king? Or the Hortley? In an apple growing region you can sample the lusty Stayman Winesap, the doughty Arkansas Black, the versatile Gravenstein, the stupendous Black Twig, or even the beguiling Sleeping Beauty, and buy of each in quantity.
True to the American commercial tradition, you can save a lot of money under the unit price if you purchase in bulk, so a whole box is always the best buy – and yet the iron that entered the soul when all those 50-pound crates of apples were purchased at the orchard tends to oxidize when those boxes are lugged into the kitchen and just sit there, waiting for you to DO something with them.
Three handy solutions are: DRY ‘EM, PIE ‘EM, AND BUTTER ‘EM.
Extremely useful to all three projects is some kind of an Apple Slicing Gizmo. It’s actually essential, for the first one: we may wax prolific about the ease and convenience of being able to turn a crank handle and peel, core and spiral-slice an apple in fifteen seconds, but if you’re going to dry them into apple rings it is the uniformity of the slices that a Gizmo produces which makes it important. Hand peeling an apple is a no-brainer, but slicing one evenly requires both knife and nerves of finely honed stainless steel, because if the slices aren’t all exactly the same thickness they won’t dry at the same time.
DRY ‘EM
A dehydrator is a very useful device to have, but you can make do with an oven or even the hot sun. Figure on using about ten to fifteen pounds of apples per batch.

To make dried apple rings you must first peel/core/slice your apples, and do it quickly. Washing them isn’t necessary since you’re peeling them. You might want to keep handy a bowl of cold water seasoned with a few tablespoons of lemon juice if cosmetic appearances are an issue; dunking the slices in it will help keep them from browning too much, and if you buy very sweet apples it may also give them a more balanced flavor.
I always choose Golden Delicious apples to dry into rings because they’re well suited for it: they don’t naturally discolor when they dry, they are very tasty as a final product, and the mealiness people usually find objectionable about a ripe Goldie isn’t an issue. Some people even leave the peels on, which improves nutrition. (In this case, you’d need to wash the apples.)
I find it most economical to put my dehydrator out in the greenhouse during the fall season. The building isn’t in use (it has no permanent resident plants) so it isn’t wet, and it’s plenty hot inside, meaning the unit doesn’t have to work hard to stay warm.
If you use an oven instead, you’ll need to ensure that it doesn’t get any warmer than 115°F., and that air can circulate. Do use an oven thermometer to keep a close eye on the temperature. Most ovens can’t be set to heat lower than about 200°F., but if you keep the door open a crack the resulting ventilation might keep the interior temperature under 120°F., which is important if you don’t want to turn your apple rings into bagel chips or worse. It will also probably warm up your kitchen significantly after an hour or two, something to consider if it’s already a hot day. Perhaps this project might be best attacked on one of those chilly, early fall evenings.
Sun-drying apple rings is possible in warm, non-humid climates, but you’re taking a chance with mold and mildew otherwise. A clean section of window screen material is handy for this: lay the rings out close together on one half and then fold the other half of the screen over and clothespin it shut to keep the bugs off. Set it up off the ground (your kid’s toy blocks are perfect for this) for good air circulation underneath, and let nature do the rest. You can also lay the rings out on cookie sheets or even on big plates, birds will help themselves. Be sure to bring everything in at night, too, if one day’s sun treatment isn’t sufficient. You don’t want your drying work undone by the dew.
PIE ‘EM

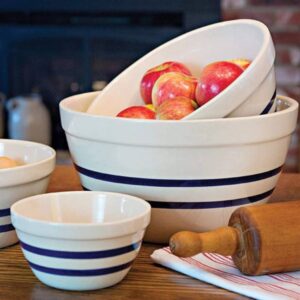
One pie, you rightly point out, uses only three or four apples; you’ve got three or four hundred. Therefore, you need to have a correspondingly large pie storage capacity (that is, a big freezer) to deal with this abundance. A very large mixing bowl is another plus. You will also need lots of quart size freezer-storage plastic bags, and let’s say a dozen metal pie tins. A serious apple pie batch can thus be anywhere from 10 pounds of apples to 30, or more; select your recipe with care!
Once the filling mix is agreed upon, multiply its ingredients up by however many metal pie tins you have – in this example, 12. (We’ll assume your mixing bowl can handle it in one go; multiple bowls means you could do two batches of 6 at the same time.) Once again you don’t need to wash your apples because you’re going to peel, core and slice them for the whole batch. An apple peeler Gizmo performs well here, although some folks are of the persuasion that pie apples must never be cut into anything smaller than quarters – eighths, only at the greatest extremity. If you’re OK with doing this by hand with 47 apples, more power to you. Me, I use the Gizmo.
 Put the prepared apples in the big mixing bowl and then add all the subsequent filling ingredients, stirring it up well. Place a quart-sized freezer bag on its side into one of the metal pie tins (not the other way round), open it up, and spoon in as much of the pie filling as you would normally want to use. This is easy to estimate because you’re just loading the pie tin as you do it. When you’ve got one pie’s worth, close and seal the bag and set it aside, still sitting in the tin. Fill another bag in the same way with the next tin, until all 12 are done. Then place all the tins (keeping them level) into the freezer. Do not stack until they have frozen solid. When frozen, the metal pie tins can be removed from the bagged fillings and put back in the kitchen.
Whenever you want a fresh apple pie, simply make up a two-crust batch of pastry, line the bottom of a pie tin with one crust, then un-bag and drop in a frozen pie filling. It’s exactly the right shape and size. Dot it with butter, close it up with your second crust, crimp, and lob it in the oven. For about ten minutes’ work you get a fine fresh-baked dessert for the whole family.
BUTTER ‘EM
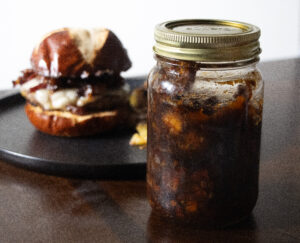
Apple butter is a uniquely delicious, almost decadent creation and surprisingly easy to make; after all it has only one ingredient, apples. And it wants lots and lots of apples. Any apple variety or combination thereof will do. A batch can be small, but it’s nearly the same fuss to make a lot of it so you might as well make a bunch and can it. With a big batch, you can even create three special sub-batches with very little trouble.
Wash, slice and core about -oh, let’s say two hundred apples. I hate to sound like a parrot here but that Apple Gizmo really saves your day when it comes down to making a batch of apple butter, but here you must ensure that it cores and slices the apples without peeling them. Leaving the peels on is one of the secrets of truly great apple butter.
Chop all the apple slices into bits if you can, then fling them into the biggest stockpot you have, add a cup or two of water so the ones on the bottom don’t scorch, and turn the heat on low. An electric stove is uniquely well suited for this project, because the burner coil distributes the same low heat very evenly all over the base of the pot, where gas stoves set on low tend to concentrate the heat at the very center. A wood stove is superb for this cookery, if great care is exercised in maintaining an even moderate fire throughout.
Stir with a big spoon or paddle as often as you can. Cover completely only at first, until the heat builds up to a steady simmer. Cook the apples until they reach the consistency of applesauce, with the peels floating about in the stew. Then set up a Foley food mill onto a somewhat smaller stockpot on the adjacent burner and, a few ladles at a time, run the whole batch of applesauce through the mill. Clean out the reserved peel mush from the mill periodically, and toss it into the compost or your chicken feed.
What remains will be of considerably reduced volume. If your food mill has a coarse screen you can improve the apple butter’s consistency by scooping up large dollops of it and pressing it through a sieve with a spatula, discarding the peel pulp that separates. Or, if you don’t have a food mill, you can ladle out the original applesauce into a blender and give it half a minute or so at medium speed, then run that through the sieve. It takes quite a few trips to the blender and sieve to do the whole batch, but the resulting velvety texture is worth it.
Cook, cook, cook that apple butter. And stir, stir, stir! Keep at it; it may take hours! If it’s late and you need to go to bed, bring the contents up to a boil, cover the pot, and turn off the heat; start it up again the next day. As long as nobody opens the lid, the contents will remain sterile for a whole day or even two.
Reduce the apple butter down until it’s thick, brown and aromatic, with a consistency like almost-set pudding. Stir frequently and it will never scorch.
When it’s ready, divide up your canning jars into three batches. If you’re like me you’ll find the deep, exquisite sweetness of the pure fruit to be everything this wondrous confection needs, so put at least a third of your apple butter into the first batch of jars, plain. Make sure you label the jars thus. Seal and process in a boiling water bath 20 minutes for less-than-a-pint jars, 30 minutes for pints.
As the canning bath is simmering, add spices to the remaining apple butter. Ground cinnamon, powdered clove, mace, allspice, cardamom, ginger – it’s up to you. Regardless of batch size, the General Spicing Rule applies (“If you can immediately identify any of the spices, you’ve used too much of that one”) so add in small increments until it’s as “spicy” as it needs to be. Put half of the remaining apple butter into the second set of canning jars, and label it as “Spiced.” Process as above.
Finally, add sweetener. Sugar, brown sugar, honey, even maple syrup will do the job. When you’ve got it as sweet as you like, can it up, label it “Sweet & Spicy,” and process as above.
Dried apple rings can live in a baggie on the pantry shelf; they’re a perfect snack. Everyone from Kindergartners to Grandparents has a personal reason to like them. I am advised that you can even reconstitute dried apples and create some sort of apple pie with them, but I much prefer an oven-ready filling made out of the fruit itself; how lovely to have one at hand whenever I need it! And homemade apple butter is one of those special rare delights that, if you don’t keep an eye open, will disappear before you know it. A wholesome treat on toast, the kids will scoff it straight from the jar if they get the chance. It’s a fantastic final touch to pancakes or waffles, performs a small miracle when spooned over plain yogurt, and brushed liberally onto a pork loin roast might change the world as you know it.
Best of all, these projects use up lots and lots of apples!














Great article. Thanks for the apple butter recipes.
I wish these articles had a priintable version. This one came in February, whereas my need for using excess apples is in August or September in years when my trees are overproducing, and I am looking for ways to use larger quantities of apples.