Alrighty then, it’s that time of year. The garden is starting to really gear up and I have more produce than we can eat before it goes bad. My plan for filling the pantry with wholesome and delicious foods that have less than 5 ingredients, none of which came out of a lab, is working.
Pickling for people disinclined to boil vinegar
So, what is a girl to do with all this bounty?
I know, I’ll lacto-ferment it all. I like lacto-fermented veggies, so does the hubbin, and I really actually find cutting up veggies to be enjoyable. I’m weird that way!
And as a completely unrelated bonus, lacto-fermenting things is so incredibly easy that even I can’t mess it up. Though I thought I had and threw out the first batch I ever made: more on that later.
Lacto-fermenting is what creates sauerkraut, kimchi and cocktail onions, to name some of the more commonly known results of the process.
It is a bacterial process, utilizing critters that are present in any environment that has not been completely sterilized (it will not work in outer space, so those of you reading this from the Mir Space Station, sorry, try it when you get back home), so yes, when I first got into this process I had to get over my germophobia and embrace the little things (metaphorically speaking). It’s similar to the fermentation that creates alcohol, just with different microbes.
Which brings me to examine exactly how one goes about lacto-fermenting, rather than creating carrot booze accidentally.
We want to attract the right kind of microbe, so we have to create the right kind of environment. Think of it as very, very small game trapping, because the microbes are all there, hanging out together. We want to encourage the lactobacilli, while discouraging the yeasts (alcohol) and other things that would spoil our food.
A note on food safety: Botulism, which is a risk factor in any food storage method, is created by an anaerobic (non-oxygen using) soil-borne bacteria. We want to make sure to expose anything that has been in contact with soil into contact with air if we are not going to heat it to the point that kills the bacteria. Safe canning practices do this, and properly followed, lacto-fermenting recipes take care of the bacteria too. Clean, dry root veggies that you’re planning to ferment do need a turn in the air. Yes, it really is that simple.
Back to the environment we want to create
In order to encourage lacto-fermentation we need a salty environment. There are several methods that create this. Here’s what I do:
I cut up the veggies I am about to preserve into relatively uniform sizes and stick them into a container, usually a half-gallon glass jar. I use canning jars if I have them, or repurpose other appropriate jars if I don’t have canning jars available.
Once I have the jar packed, I mix a minimum of 6 tablespoons of pickling salt* with two quarts of distilled water** (usually more salt, because the saltier the brine, the crunchier the veggies) and add that to the prepped jar, pouring it over the veggies.
Then I put a loose cover over the whole thing. Make sure that this cover lets air through, you do not want this sealed airtight. I tend to use (new) panty hose for this, but any permeable cover will do. Often, you’ll see folks use a fine cheesecloth.
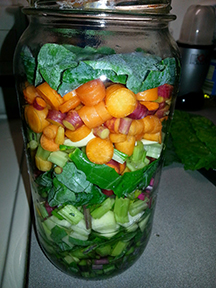
In this case, I’m using a half-gallon canning jar, but when the garden is really kicking, the pickling crocks come out and it’s ON. Nothing is safe: cucumbers, carrots, onions, peppers (haven’t done tomatoes, yet, but now I want to). When it’s harvest season my counter is full of jars and crocks of all sizes.
A tip: The little bit of liquid you see at the bottom of that jar in the photo is from another, completed ferment. It’s what I use to get the ferment going faster, but it’s not necessary. This method works just fine without a starter.
Another tip: When I cut up the veggies, I keep back some of the larger, clean leaves (or I use cabbage or lettuce leaves if there are no big veggie leaves).
The leaves form that top layer you see and will be discarded when this is done. They act as a barrier for the layer of scum that forms after a while.
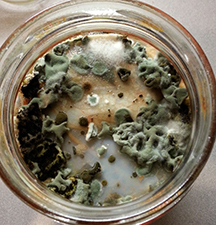
Guess what? That funky stuff is completely harmless. This stuff you see in the photo at right is why my first attempt wound up in the garbage and I could kick myself. If your ferment goes bad, you will know. The smell is simply awful. That layer of mold is normal, to be expected.
You can also use jars with airlocks in the lid. Or you can try something like the Perfect Pickler Fermentor for countertop fermenting.
My airlock jars are just all in use right now because lacto-fermented asparagus is out of this world. I ferment a LOT of asparagus.
I also cut a circle from flexible plastic to a shape and size appropriate for the glass jars. This helps the ‘leaf layer’ to keep the vegetables under the liquid and away from that layer of scum. The circle goes on top of the leaf, the scum forms on the plastic circle.
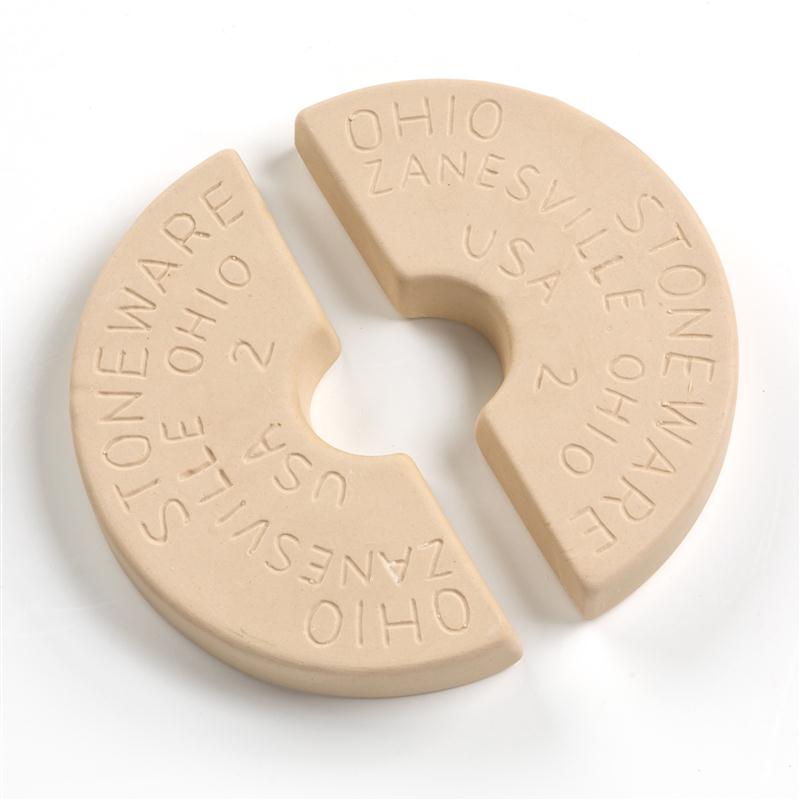
My big pickling crocks have wooden or ceramic boards that are used to submerge the fermenting foods. The ceramic boards provide their own weight, but sometimes, the wooden disks have to be weighted down on top of the ferment.
Again, because this is important: Find a way to keep the vegetables below the liquid level. Using the leftover leaves and a smaller jar filled with water to keep things compressed works. If the vegetables are exposed to the air they will become discoloured and squishy and if this happens, you should discard those pieces (the rest of your ferment is most likely still fine). You will get to know the smell of a good ferment. Trust me when I tell you that you can tell if it’s gone funky.
Put the prepared, filled, nylon-topped jar in a dark place and let her go for a few days. Take the cover off after about three days, remove the scum with a spoon or fork and taste some of the veggies. When they are soured to your liking, they are good to go.
Stick your finished veg in the fridge to slow the fermenting. If you leave them out, they will continue to ferment, so if you want that, don’t seal them airtight.
You can do your basic ferments just with brine and vegetables and get amazing results. Where this method really takes off is in the flavorings you can add.
I don’t really do ferments of anything without adding in a few cloves of garlic (which, incidentally are soooo good, once fermented). Most of my batches include some onion, for flavor and because we love them fermented. I usually add either allspice or pepper flakes, which give the whole thing a nice kick.
Experiment to see what happens. I do this in small batches and keep notes, because I learned the hard way that re-creating a recipe from memory a month later is unlikely to happen. But mostly, have fun, this is a great way to preserve vegetables and as long as you don’t cook the resulting batch of fermented veg, it adds natural probiotics to your diet.
Let’s recap–’cause it’s so easy!
- Cut up vegetables of your choice
- Put vegetables (and flavourings) in a jar that holds liquid (quart size canning jars are a convenient size and you can see what is going on)
- Make sure veggies stay under the liquid (leaves and a weight of some sort are the easiest)
- Add salt brine made from a minimum of 3 tablespoons of pickling salt to a quart of filtered or distilled water
- Cover your jar or crock
- Let sit for a while in cool dark place and check it every now and then
- When fermented adequately, store in refrigerator
This method preserves vegetables for several weeks, if not months, depending on the environment you keep them in (fridge lasts longer than shelves in the root cellar).
*Regular table salt will work, but because of the additives in it might make your fermenting liquid cloudy and less appealing.
** Tap water tends to have chlorine and other things added to it to prevent microbial growth, which is what we are trying to achieve here, so don’t use water straight from the tap. Filter it or boil it to get rid of at least the chlorine. I am lazy and just get jars of distilled water for my ferments.
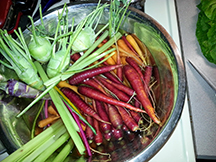
Just one more thing…about the red carrots in my ferment!
I planted both Lehman’s provided carrot seeds and seeds from another store (local grocery store) in the same soil, same bed, same conditions on the same day. They are different varieties, and the grocery store ones promised to be much bigger (at least on the package, which indicated that I should be able to expect something about twice the size of what I actually harvested.)
The Lehman’s carrots are on the right.
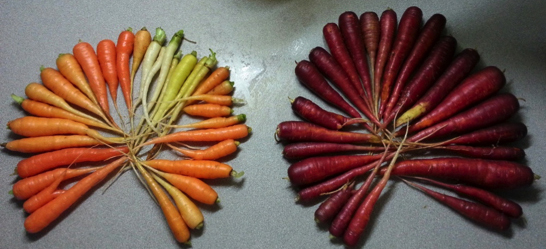
I’m sold. I don’t know if it’s just the seed stock being better or if conditions were better for that variety this year, but I think it’s the quality of the seed, since the grocery store package was a mix that was supposed to include red dragon seeds. So far I haven’t seen one yet, but then, I’m not done harvesting that plot.
I just know what I am planting for the fall harvest.
Have fun preserving your bounty!

