My husband is working out of town at the moment, and a recent visit to his place in North Carolina reminded me that leaves aren’t the only things falling from trees this time of year. In the Sandhills of North Carolina and other piney woods regions, there are pine cones. Everywhere. Big ones! And pinecones are great to use as firestarters in your kindling kit.Last fall, we talked about wax-and-fiber-based firestarters, and although they’re frugal and practical, they’re not always pretty. Not so with pinecone firestarters! In fact, with these pictures supplied from a recent pinecone firestarter project done by Glenda Lehman Ervin, our Vice-President of Marketing, you can see that a basketful of these firestarters would make a great Christmas gift!
Step One: Gather Pinecones
Look for varying sizes, just to add interest to the basket. Drier pinecones have a more open structure, but will tend to be a bit fragile, as they are dry. You want to have a nice balance so that you can easily thread the wicking though the pinecone, but if it’s too dry, the pinecone may break as you handle it. If your pine cones are wet, let them dry for a week to 10 days in a garage, basement or other weather-protected area. Shake pinecones well to avoid bringing insects into the house!

Step Two: Wrap the Wick
Yes, you’ve seen this project done before, and yes, you’ve seen it done with cotton string. But cotton string isn’t make to maximize the flame or to hold it like a candle wick does. Go the extra step, and use fine candle wick in your pinecone firestarters. You’ll get a longer, more efficient burn.
Starting at the bottom of the pinecone, tuck the wick in between the scales, and wrap bottom to top. You may find it helpful to use a small flathead screwdriver to position the wick as you get started.
Leave a tail of wick at the top of the pinecone. This will be your dipping ‘handle’ for the next step.

Step Three: Dip the Pinecone
Here you have a range of choices for your dipping media. Use up that leftover paraffin from jellymaking, melt down those candles that got bent and wonky in the summer’s heat. Or if you’re like me, and scents can bother you, use beeswax. I had some left from a candlemaking project last year, and it made great pinecone firestarters–they smelled wonderful in the basket and on the fire. (If I’d just remember to take pictures to share with everyone!)
Set up your dipping/drying area
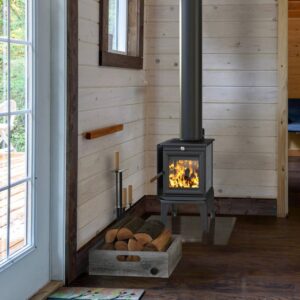
First, put the wax in a heavy, deep, straight-sided pot on low heat to melt. This works well on a wood-burning stove, as you can position it away from the firebox, and have plenty of time to get everything else ready. On a conventional electric or gas stove, check your wax frequently so it doesn’t scorch or burn. You won’t be able to use this pot for cooking food afterward, so think about thrifting for one for this project!
Second, line your drying area (I use the kitchen counter) with layers of waxed paper, parchment paper or newspaper. This is where your cones will ‘rest’ after they’ve been dipped. They will peel easily from waxed paper or parchment, not so easily from newspaper. If you have a an old cookie cooling rack or two, you can put that on top of the lined countertop, and let the pinecones rest there after dipping. They’ll remove easily. (But you won’t be able to use the racks for cookies again!)
Third, gather your pinecones, and check your wax. It should be fluid enough to dip the cones in, but not so fluid that the wax runs right off. If it’s very liquid, you may want to cool it a bit before dipping.
Fourth: Dip your pinecones! Make sure the wax covers the entire cone if at all possible. Hold the cone over the pot until the wax stops running off. Let it rest until dry, and dip again if needed. Dip until lightly covered with wax, as in the photo above. When dry, pile cones into a basket, and you’re done.

At the end of the process, you may find yourself with bits of pinecone, wick and leftover wax. Use it to make a wax brick or cake, and use that as kindling too! You can let the wax brick nearly solidify in the pot before popping it out. Alternatively, you can pour it into paper (not plastic or styrofoam) cups. Toss in a wick while still warm, and you have another clever, frugal, easy-to-use firestarter!


I made these about 10 years ago. Everyone loved them. Not sure if it helped or not but the pinecones were about 10 years old. :)
I made these about 10 years ago. Everyone loved them. Not sure if it helped or not but the pinecones were about 10 years old. :)
I have received these as gifts in the past, arranged in a basket with a large bow. Beautiful presentation and functional gift! ~TMR~
Pine cones, as long as they’re dry, are great firestarters all by themselves, but add the wax and they’re awesome!