It is hard to believe that summer has wound down, and we’re all looking at fall gardening chores already.
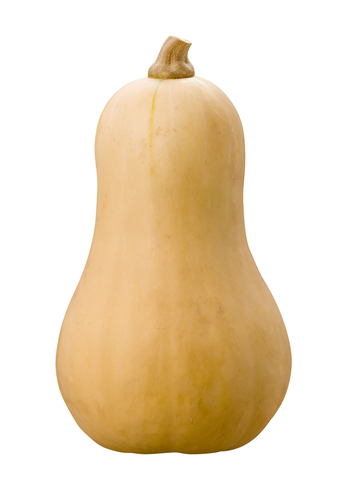
One of those fall gardening chores is the harvest and proper curing of my Butternut Squash. Butternut Squash is one of the most popular types of winter squash.
Don’t get confused with that term. By no means does that mean that you plant or harvest your squash in the winter. It simply means that the squash was bred to be harvested late in the season, and eaten throughout the winter.
Yes, it is considered a fruit but is generally displayed by foodies as a vegetable and thus marketed as one. It has a sweet flavor similar to pumpkin. In fact, in New Zealand and Australia it is known as Butternut Pumpkin and in many recipes it is used as a replacement for pumpkin.

The skin is tan, but the flesh is a lovely orange color that deepens as the fruit ripens. In most general garden talk the Waltham Butternut is one of the most popular varieties, and one you’ll find at farmer’s markets and many grocery stores.
Butternut squash is easy to grow, easy to store, and easy to eat! One of the best ways of cooking it is to just roast it in the oven.
A few simple steps are needed to ensure that you have wonderful tasting squash that will last you all winter long.
Before the first frost date you should already have your squash picked and cured. While a gentle frost may not hurt the fruit it will indeed affect the longevity of its storage capabilities.
Here is central Illinois I will begin that process about mid-September. Give or take a few days before or after but I want to give myself time to have them out of the garden before that first heavy frost.
Curing your squash will rid it of excess water which allows the fruit to become sweeter. While there has been much recent debate about the length of storage time, from no curing needed to over two weeks, I prefer to allow at least ten days to two weeks. The curing process allows for the skin to thicken which deters any rotting thus maintaining the long storage time, which can be up to six months.
Step One: Field Harvest
You will want to leave at least two inches of stem on your fruit. Snap or cut the stem. You want a clean surface on the stem. Snapping the stem flush with the fruit will just encourage bacterial growth in that area.
If you do snap the stem flush with the fruit, then you will want to eat that squash first as you will drastically shorten the storage time. The same goes for any fruit that has cuts or bruises. Keep those separate from the ones that should last longer. Mark them “eat first”, and make sure they’re accessible in your storage container.
I will leave my fruit in the field after harvesting. Again there is debate here as well. Some prefer to cure in an enclosed area with good air flow. The claim is that you will not have any loses to pest or disease. I like to let the sun and fresh air do the work.
Step Two: Field Cure
Every few days I will turn the fruit so all parts get sunlight and air flow. And then after 14 days, I will bring the fruit in. During that curing time the skin will darken a bit more and hardens even more. You can use the fingernail test to check for readiness: try to pierce the skin with your fingernail and if you can’t then the fruit is ready.
Step Three: Prep for Storage
While I’m piling the fruit in the harvest baskets, I will wipe any excess dirt from the fruit and check again for cuts and bruises again. Once all the harvested fruit is clean and dry, then it is time to put in storage.

Step Four: Cold (or Cool) Storage
Butternut squash store best at 50 to 55 degrees. I realize that many of us do not have the capabilities of maintaining the proper temperatures and humidity but there are a few ideal locations that will allow for good storage. If you have a good root cellar then you are at the top of the heap. But what if you don’t? Well, the next best place is you cool basement. Preferably in a dark corner, somewhere that stays the coolest during the winter months. A crawl space under the house is also a good location.
I prefer to set my squash on some type of shelving, in a single layer. I still want the squash to breathe and piling them all in a basket can cause bruising or the passing of disease. This way you can keep a good check on each individual fruit.
While some have luck with keeping squash in an attached garage I do not recommend this. My first concern is temperature–it’s not stable in the garage, especially if it is exposed to morning or evening sunlight. The second concern would be the idea of pulling a running vehicle in and out, releasing all kinds of fumes and contaminants into the space in which the squash is stored.
It’s quite simple to harvest and store your squash…and the idea of having this sweet, fresh dish all winter long is rather intoxicating, isn’t it?


