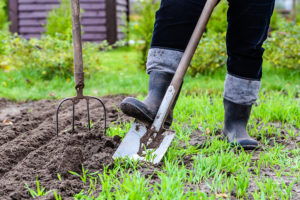
 At this time of year in your garden, spring has definitely sprung and the threat of frost is either past or diminished to near zero. You’ve weeded, double-dug and enriched your tomato beds and they’re looking so beautiful and inviting you’re tempted to climb in, yourself. The few young weeds that have sprouted since bed preparation have been ruthlessly eliminated with but the slightest effort.
In the greenhouse or the cold-frame, or maybe just that sunny window ledge –a pretty crowded one, by now— are your gorgeous, bright green tomato starts in their 1-gallon pots, some of them a foot high or more and threatening to get even leggier if you don’t do something. But hold those horses, because there are a few small steps yet to take.

First, find a sunny but sheltered spot just outside the back door (sheltered, so if there happens to be a crazy late frost it won’t settle on the plants; if need be, rig up your own little temporary tarp a foot over them) and gently transport the tomato plants there. Leave them outside for a few nights so they gradually get used to the colder air; this is known as “hardening off” the plants. It’s an important step, because if you simply set them out into the garden, the sudden colder temperatures combined with any “transplantation shock” might do them serious harm.
Meanwhile, figure out what system you’re going to use to support your vines. Thanks to man’s selective breeding just for fruit, the modern tomato plant’s stem and branch structure is hopelessly inadequate for keeping its prized crop up off the ground. Touching the earth, or even a thick bed of mulch (see below), tomatoes quickly soften and rot before they get ripe. Whether it’s Beefsteak or Cherries, you will still need to devise some way of supporting, or “staking” the plant.
 The most commonly available method is the “tomato cage,” a three- (or sometimes four-) legged set of metal hoops, concentrically larger from bottom to top. Thus as the plant grows and spreads out its branches, they come to rest on one hoop or another. Tomato cages come in various size diameters and heights at every garden center, they’re usually pretty cheap, and if you take care of them after the autumn harvest (that is, keep them out of the wet so they don’t get rusty) they’ll last you for many years.
But they do have a few drawbacks. They’re actually quite awkward to keep out of the wet because of their size and gangliness, they’re tricky to nest together, and they have a tendency to get snarled up with rakes and pea netting in the shed. And, if your indeterminate tomato plants turn out to be as –ahem— stupendous as mine sometimes are, they get so large and bear so much fruit that the cage isn’t enough and the whole shebang topples over, damaging the vine.

This last nuisance can be dealt with in either of two ways: if you splay the legs of the tomato cage when you set it in place so they’re pointing slightly outwards, when you shove them down into the soil they’ll spread out to make a broader and sturdier base. Or, if you plant half a dozen or more tomatoes in a close enough “block grouping” so that the top hoops of their cages are touching, you can then use old grocery twist-ties to connect the cages together at these points. The extra sturdiness of six or seven conjoined cages makes for a very secure framework upon which your vines may ramble in safety.
Homemade versions of the tomato cage abound, and work fine even if they’re just made of cobbled-together bits of scrap. You can take a five foot long section of heavy-gauge wire fence and pull it around the best way you can to connect the two ends together with twists of wire. A bit of massaging makes it circular, about eighteen inches in diameter. Set this down over the tomato, with the plant at its center. Poultry wire is not acceptable for doing this, however, not even for a Cherry tomato, because it’s too flimsy. Simple wooden stick frames lashed with twine; PVC pipes fitted together like a box; twine netting on stakes; bamboo trellises (like something out of Gilligan’s Island!); even just planting a sturdy pole and carefully lashing the vine to it week after week – all these methods will do.
I once made a very attractive xitomatl tipi from five long bamboo canes lashed together at the top, with a tomato planted at the base of each. After a few months of steady growth, with vines lashed up on the canes (not quite as easy as it sounds, but I did it) the thing was a veritable green Matterhorn with a great many tomatoes suspended within and without. Yeah, OK, a lot of work — but a real eye-catcher, and hey, life is short.
So finally the day has arrived when it’s time for those hardened-off, 1-gallon plants to be set out! If you’ve got more than one variety and are hoping to save some of your own seed for next year, plant the different strains in separate beds as far apart as you can get them, to be safe. It’s actually not that easy for tomatoes to cross-pollinate, but distance will help ensure it doesn’t happen.
If you’re planting by rows, start a foot into the row and mark a space for each plant about two feet apart; set your rows about three feet apart.
 I have a small garden, so I use the space-saving “block planting” approach in a bed about four feet wide. Stab a tall stick into the middle of the bed, about two feet from one end; secure a string to it, tie a big knot at about 18 inches, and inscribe a circle. Mark off six equidistant spots on the circumference of this circle; the easiest way is to pick any spot on it, hold down the knot there, then pull out the central stick. Use it to mark the two spots on the circle that are 18″ away from the knot. From either of these spots, measure contiguous string-lengths until you come all the way around the circle. There will be six spots marked. If you measure with a tape, you’ll find that no matter where you made your first mark, each of these spots (including the center hole mark) is 18 inches from its neighbor.
To add extra plants to this block, stab the stick into the mark that’s furthest along in the direction you want to go, and start the process again with a new circle.
At each spot you’ve marked, excavate a hole somewhat larger and deeper than a 1-gallon pot; this should be child’s play with your loose, loamy, double-dug soil. Sprinkle a little more fertilizer into the hole if you like, and then gently winkle a tomato plant from its 1-gallon pot by turning it upside-down and depressing the bottom, and catching the emerging plant between outspread fingers as it slides out. The root ball should stay together. Holding your other hand under it, turn the plant right-side-up and then lower it into the hole – deeply, if it’s tall and leggy. Whatever length of stem is buried will quickly sprout roots.
As a general rule for tomatoes, what is visible above ground should be roughly square in proportion: that is to say, when it’s newly planted in the bed your tomato vine should be about as tall as it is wide.
Fill in the hole with the excavated soil until it’s level; mound some of the extra soil up slightly around the central stem and press down gently to firm it. Create a shallow crater wall with the remaining extra soil as a root basin around the plant, to trap irrigation water. If you’re planting in a block these root basins can interconnect. If this is the case, make sure the vines are planted evenly level.
Then set your tomato cage gingerly over the plant and shove the legs firmly into the soil to about two thirds of their depth, adjusting so the cage remains level. If you’re using something other than a tomato cage, install it in a similar way. Take care you don’t break any branches of the still-fragile tomato vines.
Now water the plants, but not overly much; filling the root basin once ought to be fine. You should come back and water again the next morning, though, and repair any cave-ins or other trouble spots you find.
Don’t panic if for the next day or two (or three) your tomatoes look a bit droopy and unresponsive. This is known as “transplantation shock” and it’s usually better or worse depending on how quickly the vines were planted (quicker is better), how gently they were handled (did you damage any roots?), and how extreme the temperature change has been from day to night since they were set out (tomatoes don’t like a change of more than thirty degrees F.). If it looks to be very sunny indeed after you’ve set them out, drape some shade netting or reemay over the cages to lessen the sun’s intensity for a day or two.
 Finally, mulch each tomato plant thoroughly. “Mulch” means a protective covering a few inches thick of some natural material – pine needles, chipped bark, dry leaves, even shredded newspapers will do— that is spread around each vine. Mulch does your garden a world of good. It shades the soil to regulate temperature and minimize water evaporation, and it also tends to smother emerging weeds. Later on, after the harvest is over and the vines have been uprooted, if you dig the old mulch into the soil it quickly breaks down and adds vital humus.
I like to use old hay or straw as mulch because I can get it in quantity for free down at the local feed store, from the heap of loose stuff they sweep out of the loading dock at the end of the day. I do pay attention, during the summer, to any hay seeds that sprout from the mulch and I remove them promptly, but other than that, hay mulch is attractive looking, effective, and brother the price is right. Try it and you’ll find that after just a few years of conscientiously digging your mulch into the soil, your garden soil will develop a tilth as light and fine as cottage cheese and will maintain this even through heavy rains.
And what about watering the tomatoes? I’ve read arguments for both giving and not giving the vines abundant water. In my experience on earth, I’ve noted that just about all plants like water, and vigorous plants (which aspirate a great deal through their lush foliage) enjoy vigorous watering. So I say, if you have the water, give it to them; but if water use is an economic issue for you (or you’re in drought conditions) then maybe don’t give them so much. Your tomato vines’ soil should never be swamped, or soggy, but neither should it ever dry out.
Since it rains only rarely during the tomato season in my neck of Northern California, I do all the watering and I usually do it every three days. If it’s a stretch of hot weather, every two days. Obviously, if the vines are visibly wilting from the heat, they get more water. If it’s overcast and cool day after day, they get irrigated every four days.
Always water your tomatoes from below, not from above! Tomatoes are very “juicy” vines, and circulate a great deal of moisture throughout their branches and leaves, so getting the leaves wet –particularly at night— only encourages dreaded fungal infestations like verticillium and fusarium. Some newer tomato strains are resistant (the name of the variety will be followed by the letter V or F, depending which fungus it can slough off) but the flavorful heirlooms aren’t.

You also don’t want to splash the plants with water or mud when you water from below. This transfers microorganisms from the soil to the leaf surfaces where they don’t belong and where they’ll do harm. Get yourself one of those bulbous perforated deflector things that screw on to the hose in order to break up the force of the stream. Water your tomatoes exclusively with it.
Hold the bulb down low at the base of each plant for a count of ten; your mulch should be loose enough for the water to easily penetrate, not matted together and shedding moisture (which is why I don’t use lawn clippings as mulch, because it tends to become a mat). When you’ve finished watering all the tomatoes, go back to the first one and do every vine a second time. Just like a damp sponge will collect more liquid than a dry one, the water percolates down deeper through soil that’s already moist.
If all your root basins are connected, make sure when you first irrigate that there’s an even depth of water collecting around each plant, because this won’t be visible after you mulch. You could leave the hose on the central plant for a combined count rather than do each individually, but you still need to come back after a few minutes and do it a second time.
If overhead irrigation is simply unavoidable it’s best to do your watering in the early afternoon so the plants have a chance to dry off before night falls.
Next time: Tomato nutrition…


A newsletter reader submitted this comment:
Hello;
I was just reading the tomato post you had on the site. It reminded me of a funny story only someone who loves gardening can appreciate.
I used to work for a large laboratory in the Chicago area. One day the management realized that lots of precious metals had been purchased over the years and they did not have a good record of where all of it was located and since this was several million dollars worth of stuff they figured they had better find out. So they began their search for all this metal. They tracked it by going to the different labs and taking inventory of the metals. They went to this one lab looking for a good number of 1/2″ diameter 36″ long platinum rods. These rods were worth several hundred thousand dollars. They searched the lab and couldn’t find them and since they had been purchased several years ago no one seemed to know anything about them. They were all upset this was a lot of money just to be missing. So they continued their search by interviewing everyone who had worked in that lab. They found out one guy was out sick and decided to go to his home to interview him. When the got to the home they noticed the guy had a very nice garden growing in back. They sat down with the guy and explained why they were there. The guy looked really sick suddenly and said. “Are these rods sort of silver looking, about 3 feet long?” They told him yes and he began spitting and sputtering, and finally stood up and told the people to come with him. As they walked to the back yard the guy began to explain the rods had just been laying around the lab for a long time and no one seemed to know what they had bought them for. So thinking they were just some junk he didn’t think anyone would mind if he borrowed them. As they came to the guys garden he walked over to the tomato plants and raised up the stems so they could look inside the plant, and there was a pretty silvery rod sticking in the ground to hold up the plants. The worlds most expensive plant stakes! The platinum rods, of course they guy immediately pulled them out and replaced them with some wooden dowel rods he had. I never did find out what happened to the guy, but I am pretty sure he didn’t have a job anymore.
[…] Growing Tomatoes, Part IV: Productive Maturity […]