There’s something special about the aroma of freshly baked bread wafting through the kitchen, isn’t there? The warmth, the comfort, the anticipation of that first delicious bite. Today, we’re diving into the art of breadmaking, and making a loaf that looks (and taste) perfect.
Homemade Sandwich Bread, Step by Step
Here are steps for how to make sandwich bread. (The full recipe with ingredients can be found at the end of this post.)
1. Activate the Yeast
In a large mixing bowl, combine the instant yeast with ¾ cup of warm water (make sure it’s not too hot, as it can kill the yeast) and the granulated sugar. Give it a gentle stir and let it sit for about 5-10 minutes until the mixture becomes frothy and bubbly.
2. Mix the Dough
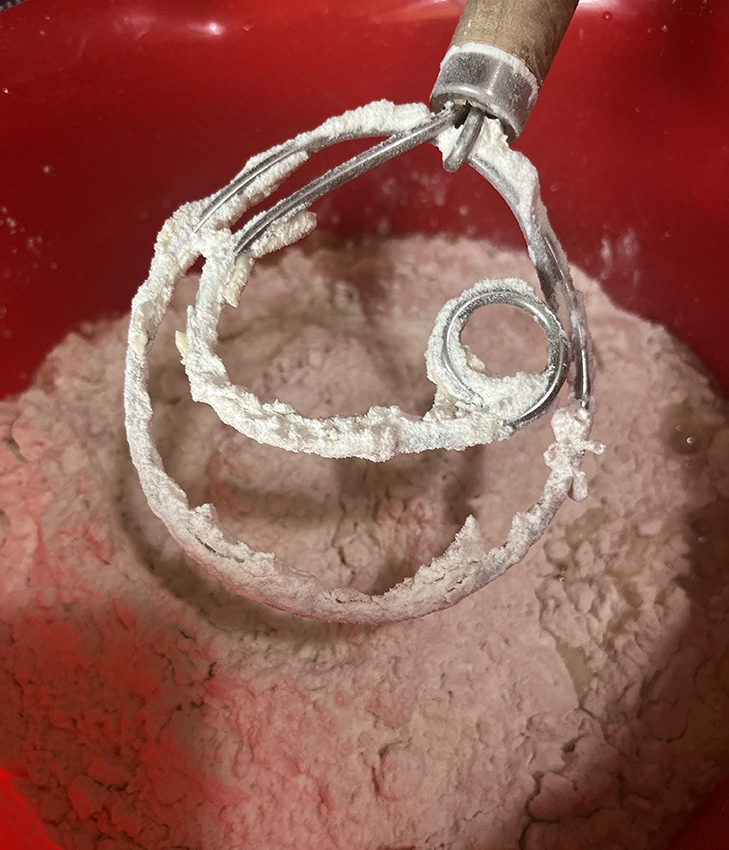
Once the yeast is activated, add the salt, cubed unsalted butter, and the remaining 2 2/3 cups of warm water to the bowl. Gradually incorporate the flour into the mixture, about 1 cup at a time, stirring until a smooth, slightly tacky dough forms. I use a dough whisk to start and then start to knead in the remaining flour once a ball of dough forms. You want your dough to be a solid ball and be able to poke it and not have any dough on your finger.
3. Let it Rise
Place the kneaded dough in a greased bowl, cover it with a clean kitchen towel or plastic wrap, and let it rise in a warm, draft-free place for 35 minutes, or until it doubles in size. This initial rise allows the yeast to ferment and leaven the dough, creating those airy pockets that make homemade bread so irresistible.
4. Shape and Proof
Once the dough has doubled in size, gently punch it down to release the air pockets. Divide the dough into two equal portions and shape each into a loaf. Press each section out into a rectangle; it doesn’t need to be flat or anything. Roll each section up into a log and pinch each end closed and slightly pull the pinch section to the bottom so the sides are smooth.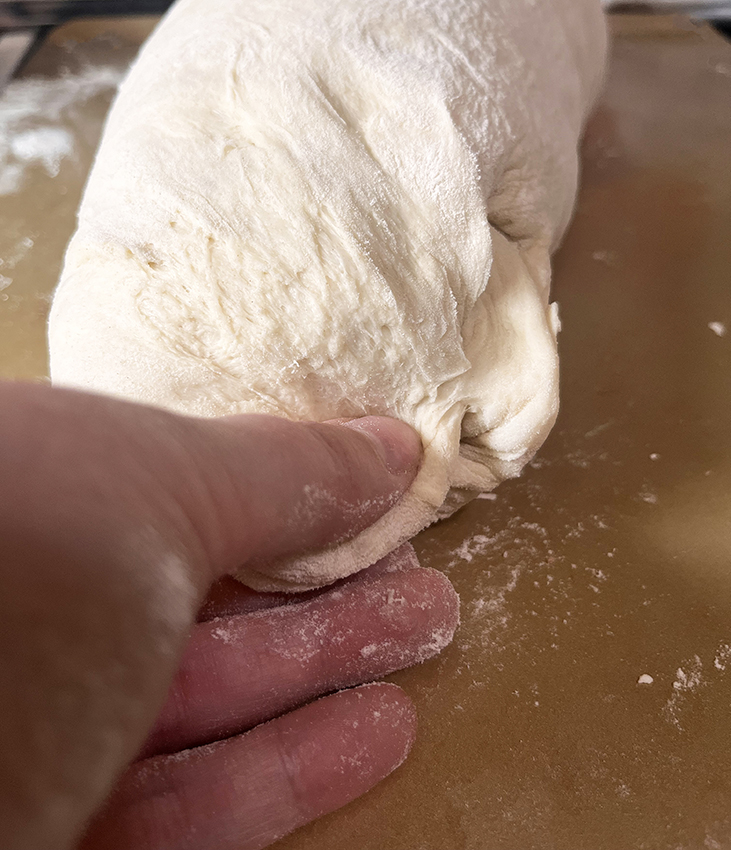 Place each loaf into a slightly oiled pullman pan, cover them loosely with a towel, and let them proof for another 30-45 minutes.
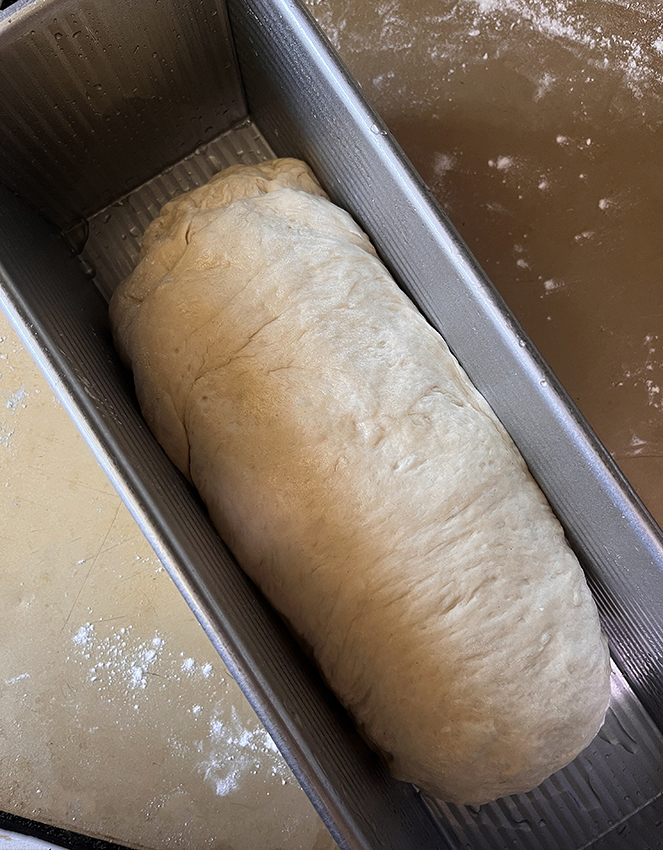
NOTE: Your loaf should not fill up the whole pan. I would not recommend covering it with the lid of the pullman pan. If the loaf is proofed too much, it will be difficult to remove the lid.
TIP: To proof, you can turn your oven on to 400 F and put your loaf pan on top and at the back of your oven.
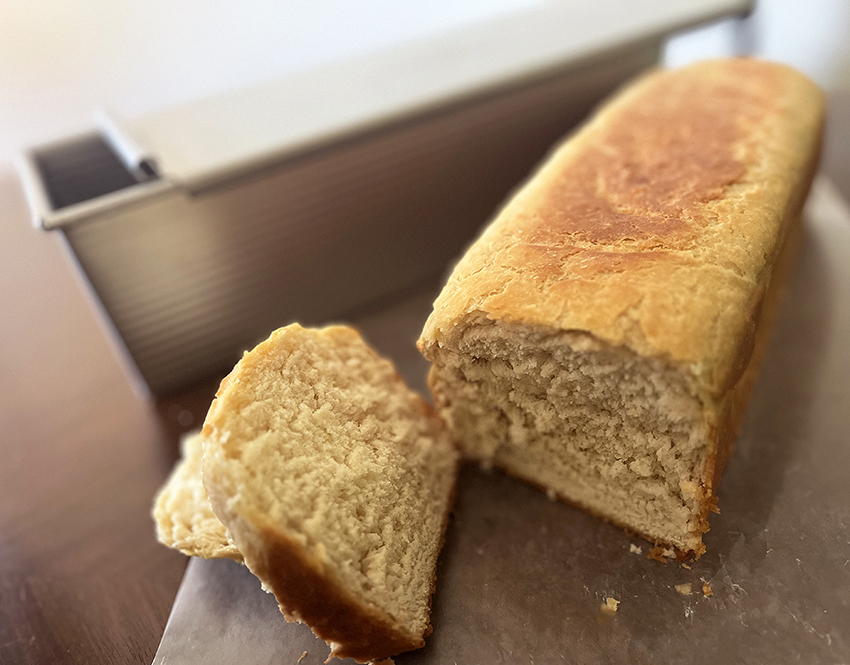
5. Bake
Preheat your oven to 400 F. Before baking, brush the tops of the loaves with melted unsalted butter and slide on the top of the pullman pan. The lid allows for your loaf to bake evenly and in a perfect, loaf shape. Bake the loaves for 30 minutes. After 30 minutes, take out your loaf and brush with more unsalted butter and place back in the oven uncovered for an additional 5-10 minutes.
In a world filled with pre-packaged convenience foods, there’s something deeply satisfying about taking the time to create something from scratch. With just a handful of simple ingredients and a little bit of patience, you can transform humble flour and yeast into a loaf better than any store-bought one. So why not roll up your sleeves, dust off your apron, and embrace the joy of homemade breadmaking? Your taste buds will thank you. Happy baking!
Print
Sandwich Bread
Ingredients
- 4 1/2 teaspoons instant yeast, equivalent to two 0.25-ounce packets
- 3/4 cup + 2 2/3 cups warm water, divided
- 1/4 cup granulated sugar
- 1 tablespoon salt
- 3 tablespoons unsalted butter, cubed, at room temperature
- 8 to 10 cups all-purpose flour
- 2 tablespoons melted unsalted butter, for brushing
- 1 tablespoon of olive oil
Instructions
- In a large mixing bowl, combine the instant yeast with ¾ cup of warm water (make sure it’s not too hot, as it can kill the yeast) and the granulated sugar. Give it a gentle stir and let it sit for about 5-10 minutes until the mixture becomes frothy and bubbly.
- Once the yeast is activated, add the salt, cubed unsalted butter, and the remaining 2 2/3 cups of warm water to the bowl. Gradually incorporate the flour into the mixture, about 1 cup at a time, stirring until a smooth, slightly tacky dough forms. I use a dough whisk to start and then start to knead in the remaining flour once a ball of dough forms. You want your dough to be a solid ball and be able to poke it and not have any dough on your finger.
- Place the kneaded dough in a greased bowl, cover it with a clean kitchen towel or plastic wrap, and let it rise in a warm, draft-free place for 35 minutes, or until it doubles in size. This initial rise allows the yeast to ferment and leaven the dough, creating those airy pockets that make homemade bread so irresistible.
- Once the dough has doubled in size, gently punch it down to release the air pockets. Divide the dough into two equal portions and shape each into a loaf. Press each section out into a rectangle, it doesn’t need to be flat or anything. Roll each section up into a log and pinch each end closed and slightly pull the pinch section to the bottom so the sides are smooth. Place each loaf into a slightly oiled pullman pan, cover them loosely with a towel, and let them proof for another 30-45 minutes.
- Preheat your oven to 400 F. Before baking, brush the tops of the loaves with melted unsalted butter and slide on the top of the pullman pan. The lid allows for your loaf to bake evenly and in a perfect, loaf shape. Bake the loaves for 30 minutes. After 30 minutes, take out your loaf and brush with more unsalted butter and place back in the oven uncovered for an additional 5-10 minutes.
Notes
NOTE: Your loaf should not fill up the whole pan. I would not recommend covering it with the lid of the pullman pan. If the loaf is proofed too much, it will be difficult to remove the lid.
TIP: To proof, you can turn your oven on to 400 F and put your loaf pan on top and at the back of your oven.


Looks great! I love that pan.
I have two different sizes of the Pullman pan with lids???