The Origin Story
I’m a self-employed stained glass artist, hippie, geek, freak, and hands-on type person. I just bought a new-to-me house after years of apartment dwelling, and because it was a foreclosure, I had received a “you must fix immediately” list from my friendly neighborhood insurance company the minute I closed on my new abode. The list was long and non-negotiable. But that list is inadvertently responsible for my lark into maple syrup making.
Item number 3 on their “Fix immediately” list was “tree trimming”, and in the midst of pruning a rather stately specimen, my partner and I noted that there was liquid coming from the pruned branches, similar to the amount one sees from a drippy faucet. Thank goodness for Google and smartphones, because we established within a few minutes that the tree in question was a sugar maple, and that another variety of maple was also on the property. I read that any maple can produce sap for maple syrup, but that the sugar content varies by species.
Since I tend to find domesticity that results in stuff I can eat a rather cool concept given my self-employed artist status and hippie tree-hugging ways, I thought it would be nifty to try making maple syrup, especially if I could find the supplies to do it around the house. I mean, I can’t remember phone numbers for squat, but prices on food? Sheesh… I know how much maple syrup costs, and with the aforementioned (and expensive) list of “must fix immediately” decided that beyond the novelty of it, maple syrup making would be pretty cost-effective in terms of the time invested.
So I read up on how it’s done, courtesy of Google. Maple syrup-making is not rocket science, and I’m dating a rocket scientist, so I can say that with some authority. Syrup making is simply time-consuming, as so many old-fashioned things seem to be. The only other real factor of consequence is that syrup making is a late winter or early spring activity, as this is when the sap “quickens” and flows through the tree. Since syrup is a sugar, and sugar is a great base for growing bacteria and other icky things, sap should be kept cool until producing syrup, and the sites I came across mentioned stopping your collection after the temperature stays consistently above freezing.
Starting Out...
To get started, you need to drill a 2-3” inch deep hole in the tree, with a 7/16” or 3/8” drill bit, and angle it up so that the sap will flow down it like a slide. I read that about 3 feet off the ground on the sunny side of the tree is ideal, and that your tap shouldn’t be directly below a branch or major twist in the tree. (I didn’t remember the ratio of taps per tree diameter, so I just put in one tap per tree.) Next, you’ll need collection buckets of some sort.
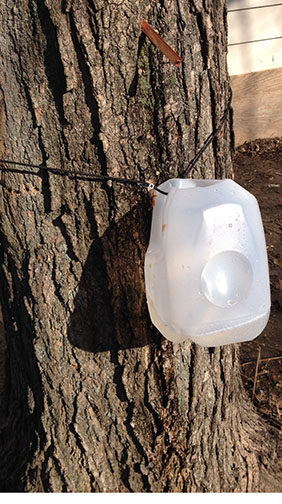
I used a clean milk jug and a clean 3 gallon plastic vinegar jug. I recommend the vinegar jug as it’s made of harder plastic and can hold more liquid. Take the time to aim your spiles really well so that you can keep the jug mouth as small as possible, as it cuts down on bugs, tree bark and detritus from falling into your sap. In the photo, you can see I had to cut a bigger mouth on the milk jug.
I used two screws (one on either side of the jug) to help keep the jug in place as it gets full, and I simply tied the jug to the screws with some skinny rope that had no stretch to it.
If you use stretchy rope, you’ll lose a lot of sap as the weight changes in the bucket. Also, water, which is what sap mostly is at this point, weighs about 8 lbs/gallon, so if you have a 3 gallon jug, your rope better be able to support 25 lbs. of dead weight.
The spiles were tougher to make. (A spile being the thingy that gets tapped – NOT pounded – into the tree to form a collection spout.) I read on Google that slender PVC pipe cut at an oblique angle works, but I didn’t have any on hand.
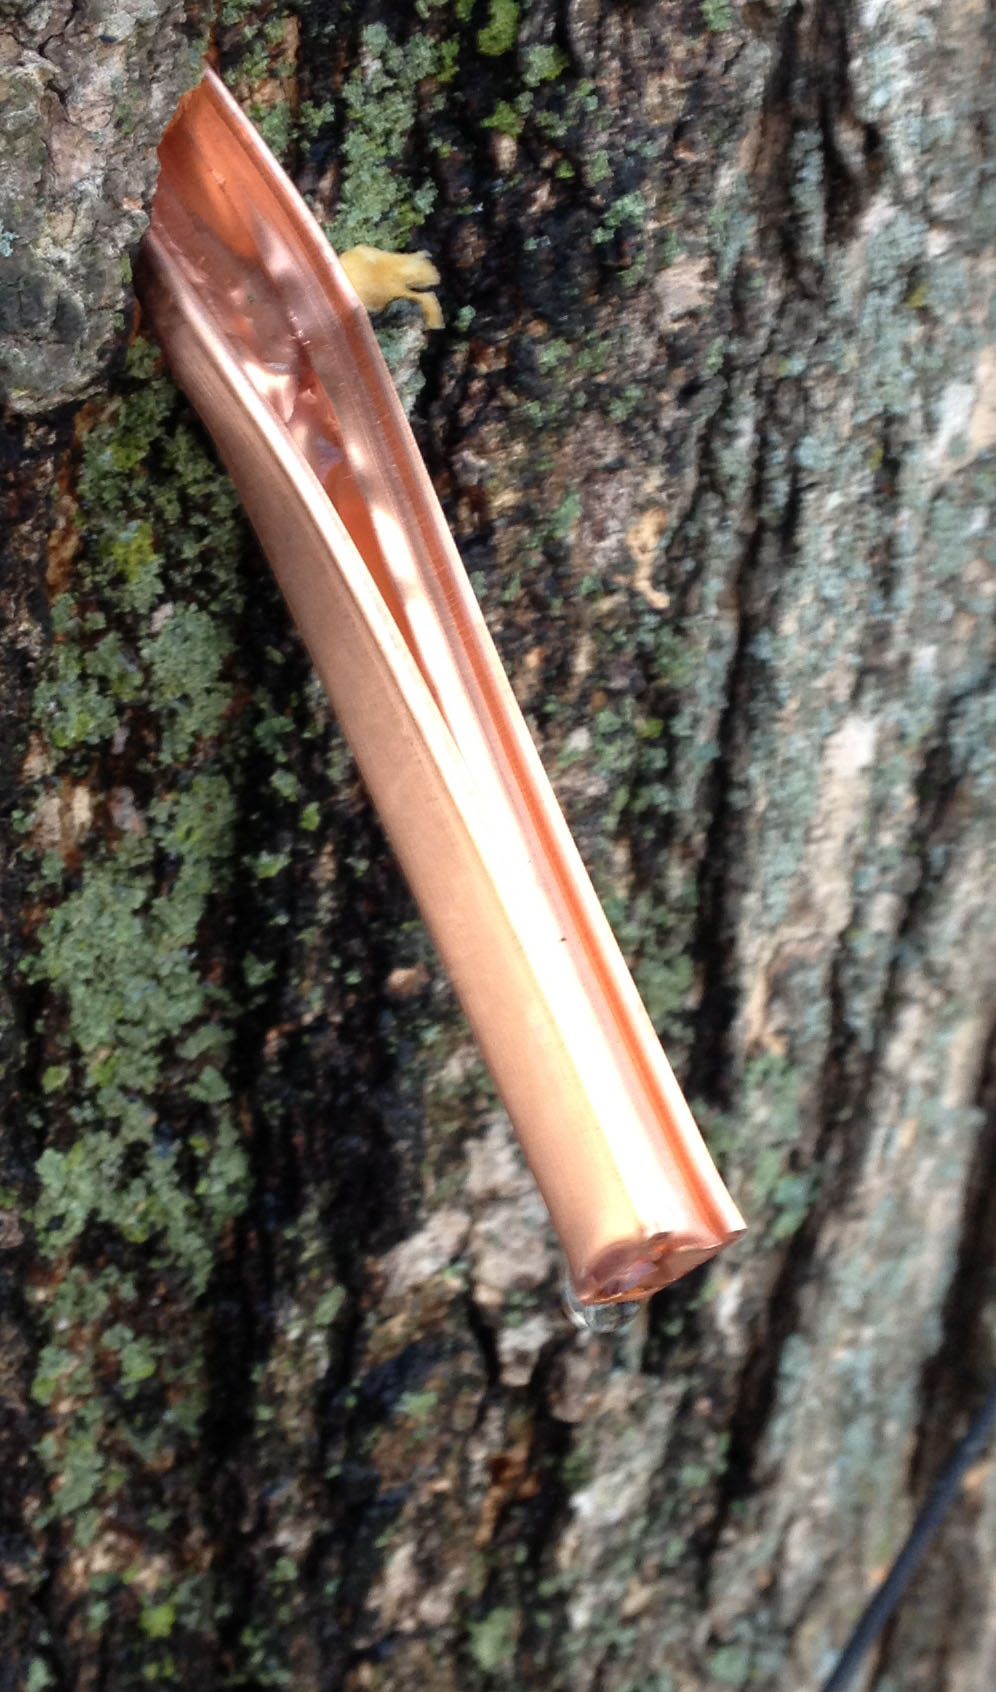
In looking around, I spotted some scrap copper channel that I use in my stained glass art, so I rounded it out, and used that for my spiles.
My reasoning was that although copper is toxic to trees over a long term, the shape was workable, and copper is a natural antimicrobial, meaning that icky stuff I don’t want to be ingesting can’t live on copper.
However, I wasn’t able to get the shape perfectly round, which means there is some wasted sap that slowly makes its way down the front of the tree. Given that, and the toxic nature of copper to trees, I’ll probably switch materials next year so that the shape fits the hole better and so that I’m not accidentally poisoning my trees.
Moving From Sap To Syrup
After about 16 hours of collecting sap from two trees, each with one spile, I had about 2-2.5 gallons of sap. (Your collection may vary, as sap amounts vary per tree and with the weather.)
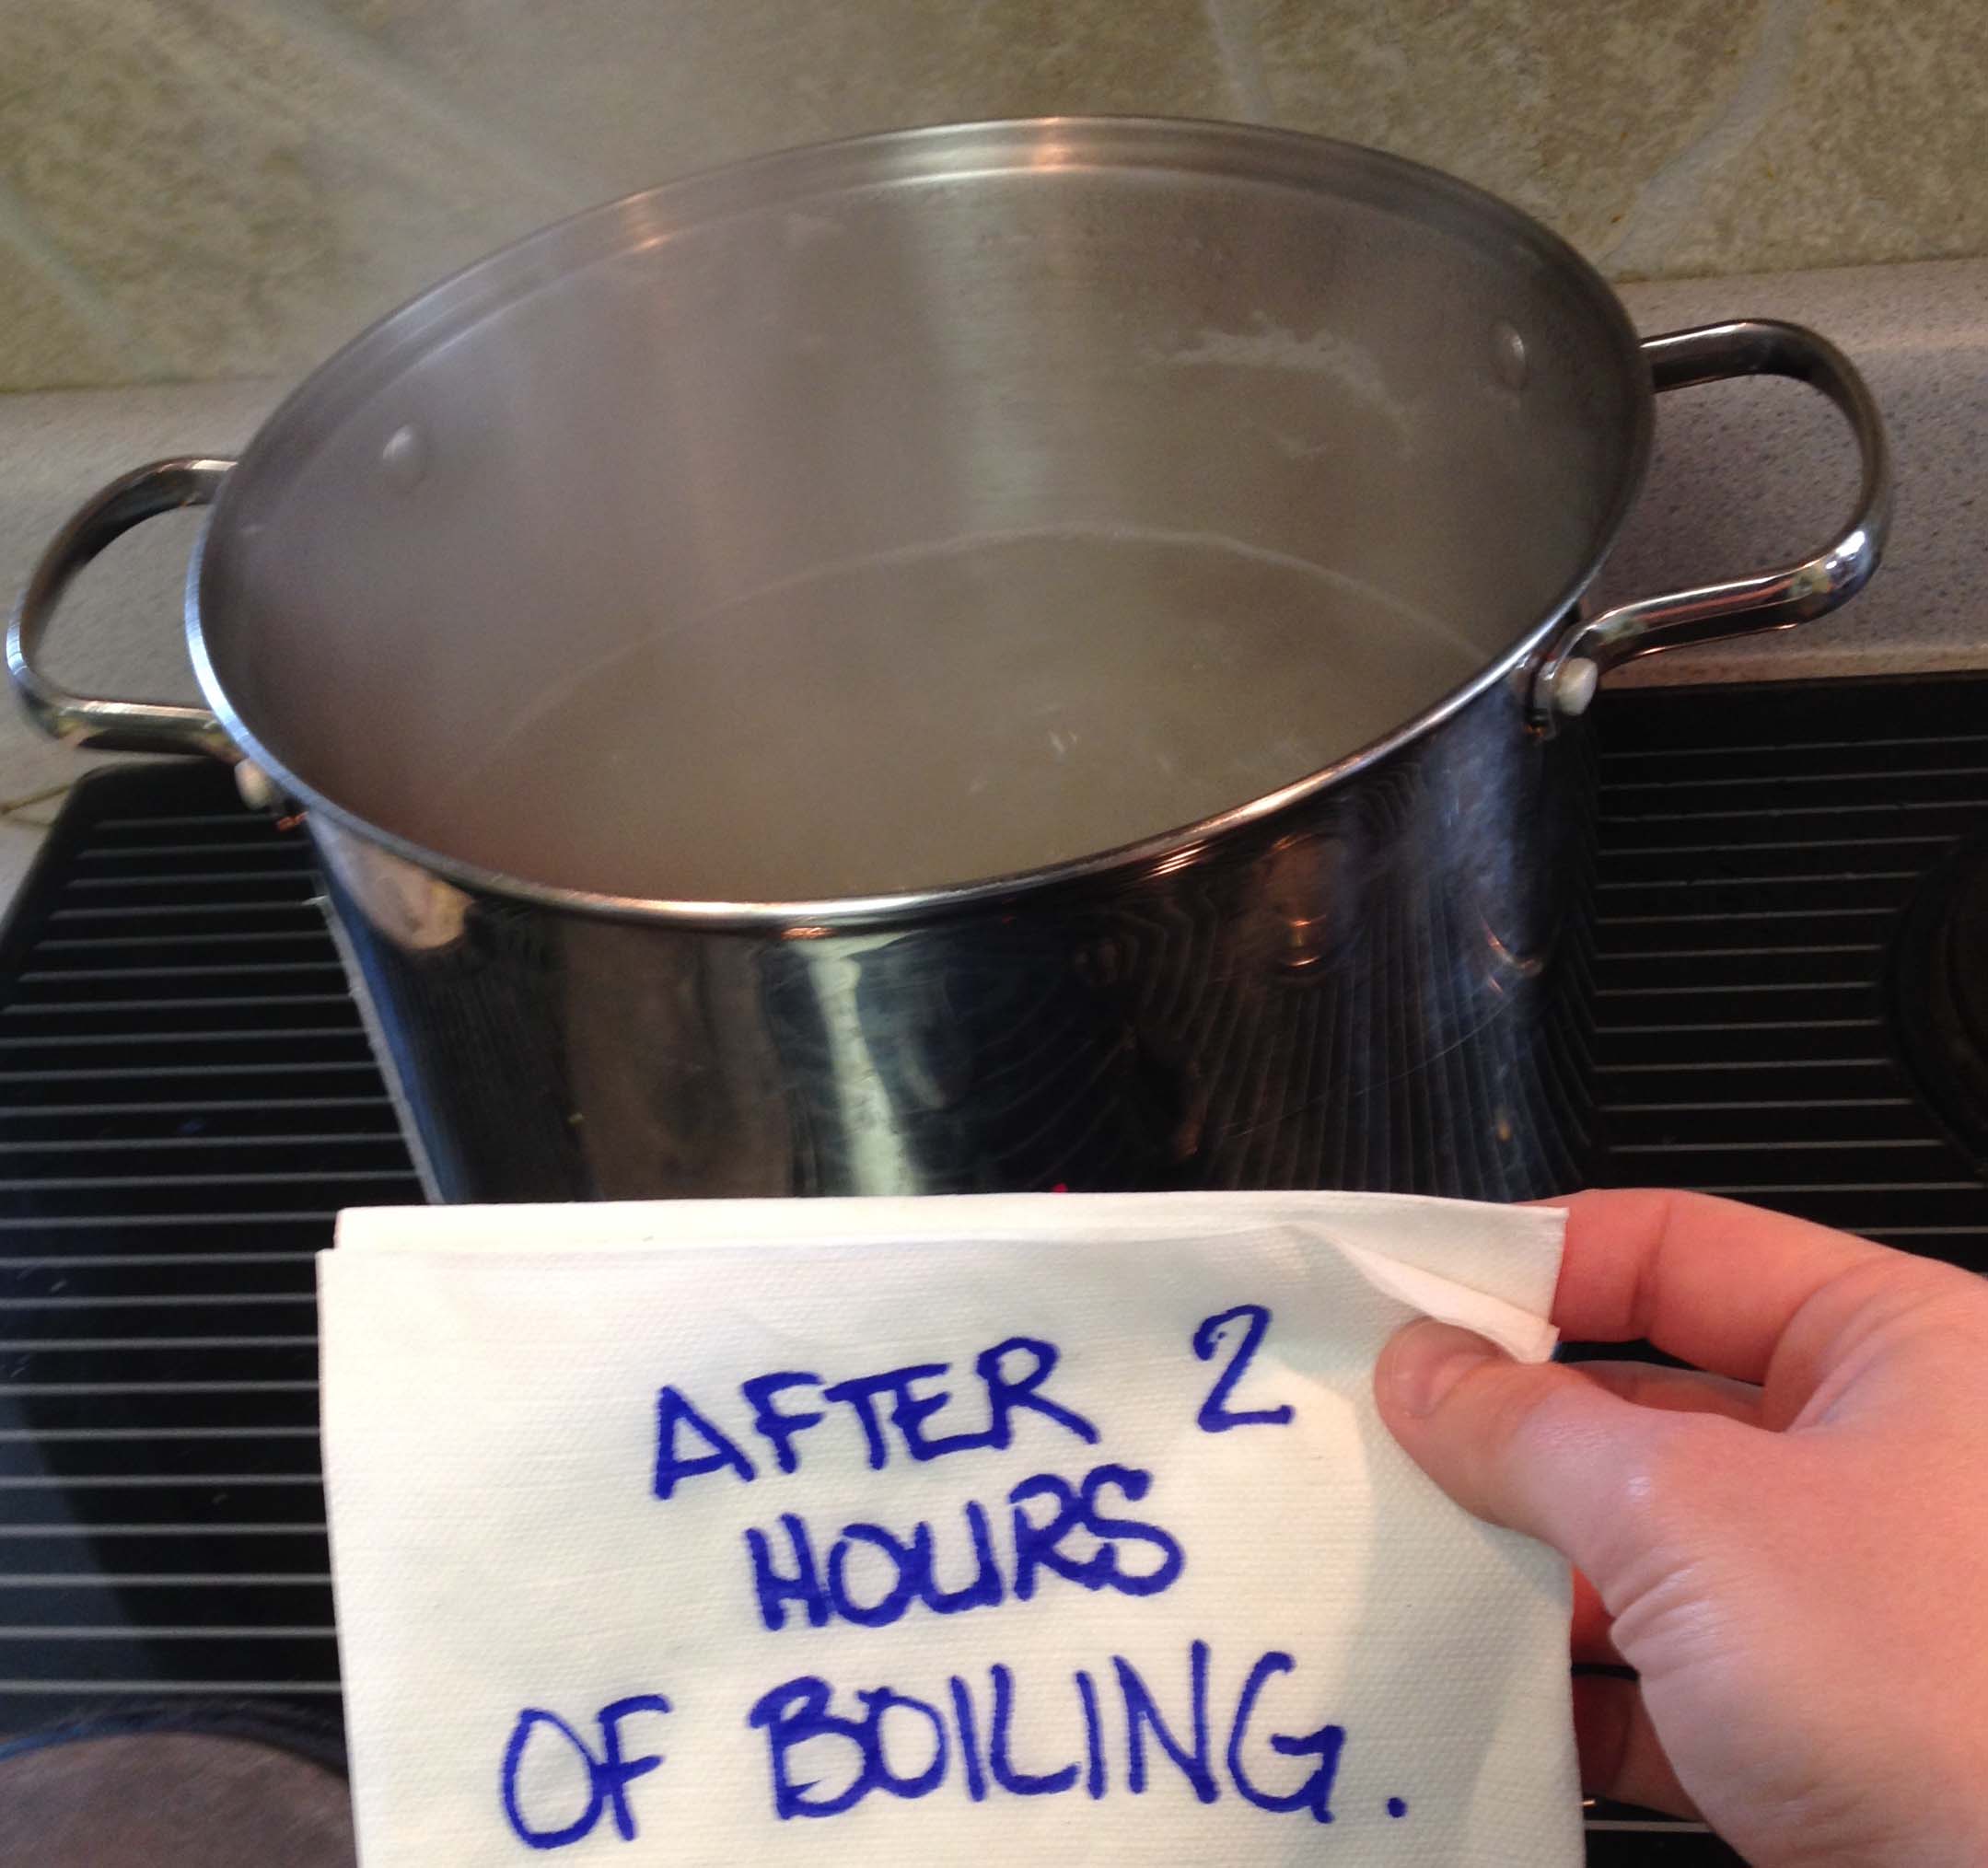
I started the boiling process in the morning, and after about 4-5 hours, I had syrup.
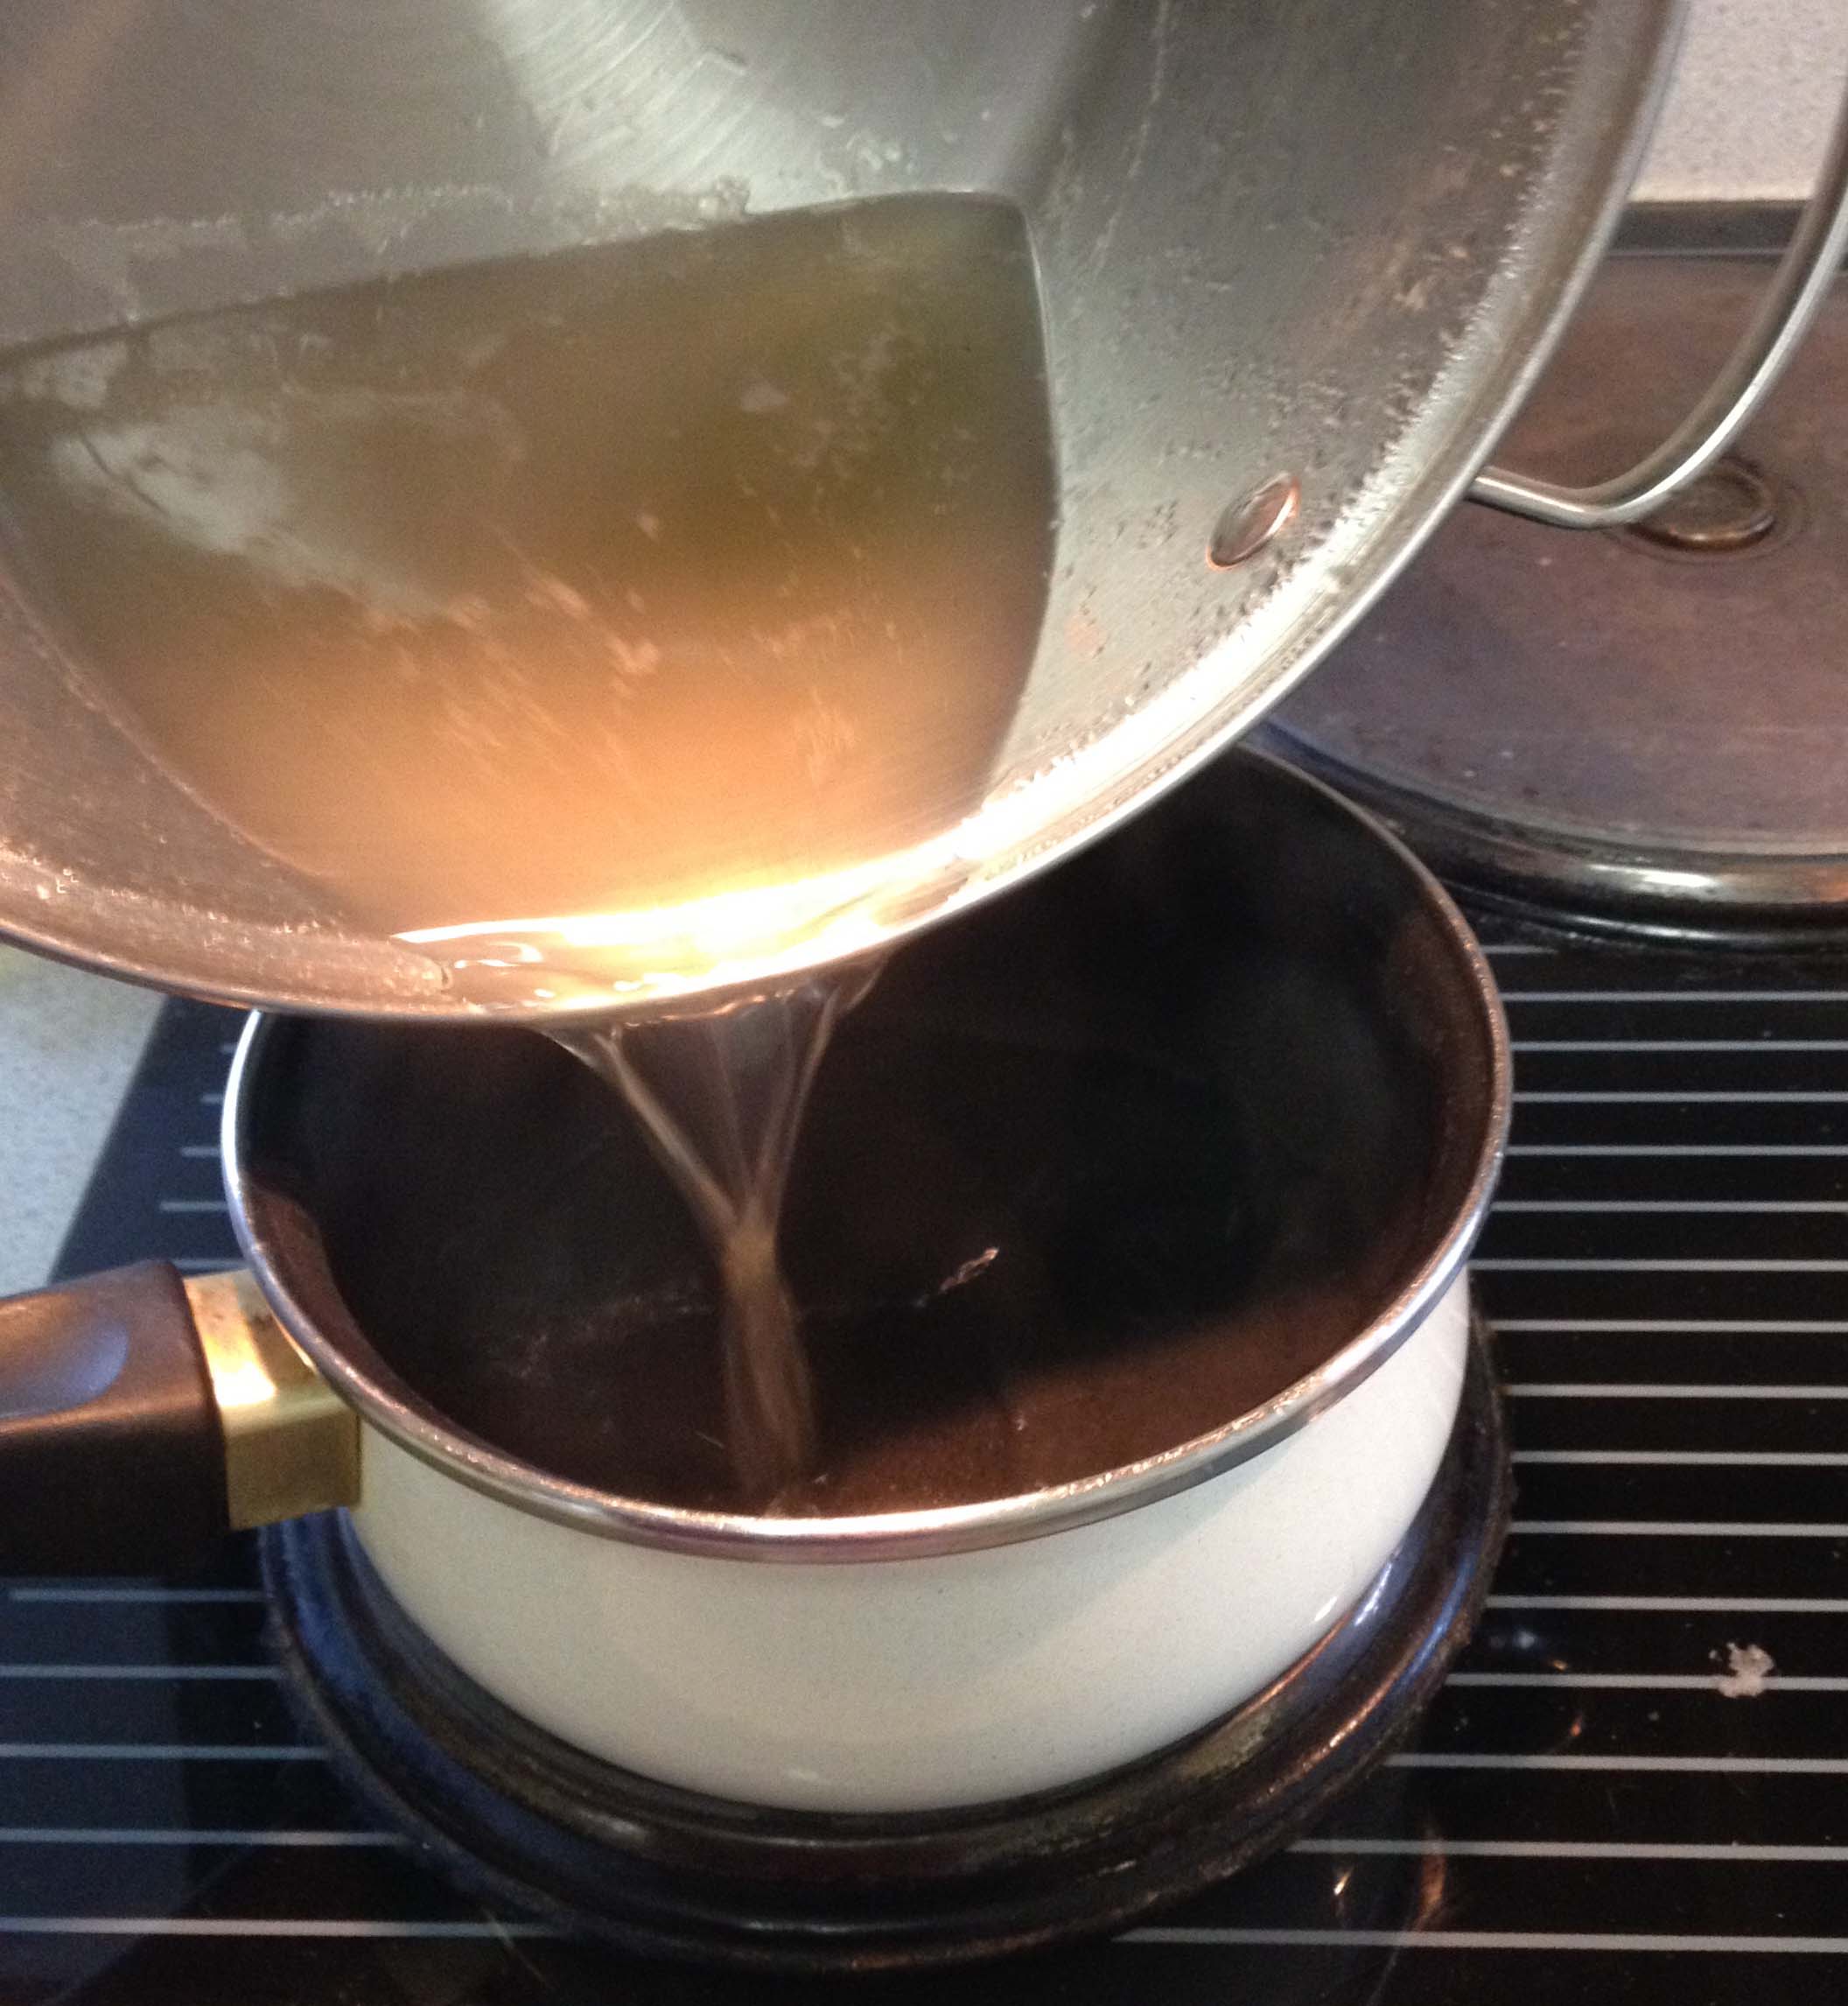
I started with a much deeper pot than I had sap, because I needed to boil the sap down, and since boiling stuff splashes, anywhere the sap splashes is (logically) sticky and tough to clean up. In the photo, you can see that I used a large, deep stainless steel stockpot, with no lid, so the water in the sap can evaporate.
Other things I found while boiling sap is that boiling liquid creates a lot of steam. Okay, duh, right? But think about how much steam making pasta for dinner creates, and then imagine if the pasta had to be boiled for 4-5 hours. That’s about how long I boiled my sap/syrup!
Back to Google: I read that most serious syrup production is done outside because of the amount of steam, but that just wasn’t an option in my case.
I’m also bit of a germaphobe. I boiled my sap on high for about ten minutes just to be really sure that any bacteria or icky stuff got killed, and then reduced it to a light boil, where there’s rumbling liquid, but it’s not splashing all over and making a mess. An over-the-stove fan running on high is also great to help alleviate the overabundance of steam.
It’s Almost Syrup!
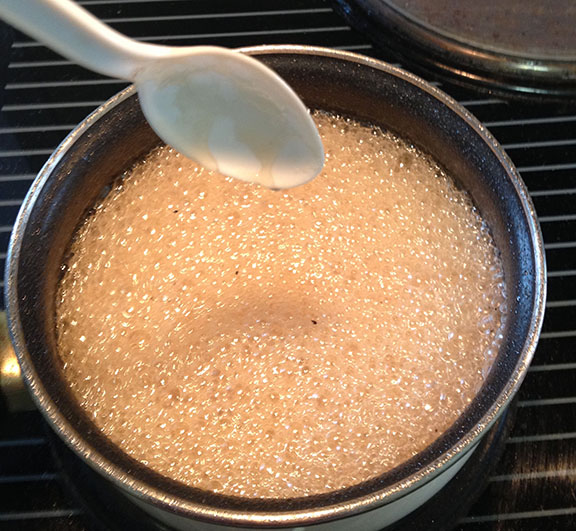
After about 4 hours, the color had changed from clear liquid to the color of herbal tea, and my 2-2.5 gallons had boiled down to about 3 cups of liquid. At this point, I switched it into a smaller pot (still leaving way more room than I needed though so I could turn the heat back up and not have sticky stuff spatter all over my stovetop). (Editor’s note: the bottom pot of a double boiler would work well here.)
I had read that when the syrup started to get a little thicker than water, I needed to keep my eye on it. So I did.
The color continued to darken, and just as it was reaching the soft crack stage in temperature, I realized it was about done. If you are familiar with candy-making, soft crack is when there are homogenous bubbles all over the surface and the syrup looks kind of oily, but its still thinner than maple syrup out of the fridge.
Another Google suggestion was to dip a spoon into it, and when it drips off but leaves the spoon covered is another good visual for “your syrup is done”.
If you continue to boil it beyond that the consistency will be overly sludgy. I imagine you can mitigate this (so long as you haven’t burnt it) by adding tiny amounts of water and stirring it back in, but I happened to land it at the right viscosity my first time.
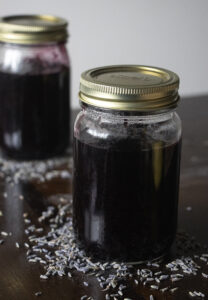
Next step: filter and store! I happen to be a lover of loose tea, like the British, and had on hand loose tea filter bags, which are basically coffee filters that have been sealed up the sides, making a baggie but out of coffee filter material.
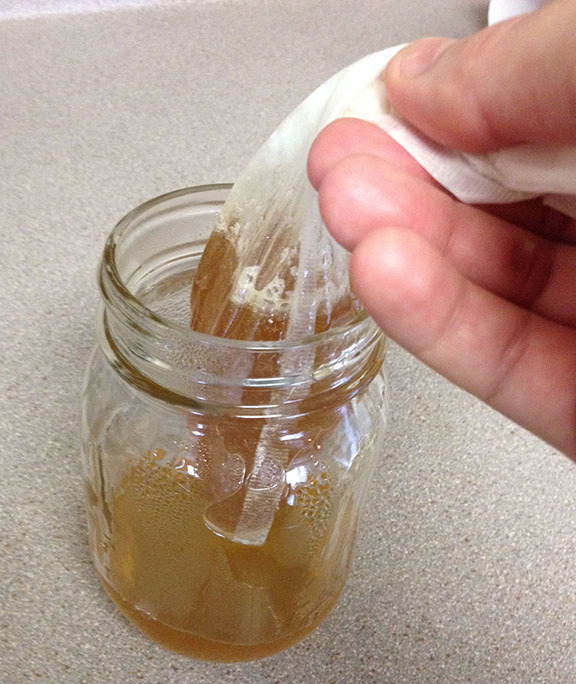
I read that you can use superfine cloth, or anything that will keep the little bits of bark and debris out of the syrup while letting the syrup flow through the filter. I sat one of my tea filters into a clean canning jar, and poured my syrup into it.
Slowly (because tearing the filter due to overtightening it too quickly defeats the purpose of a filter,) I twisted from the top down, forcing the syrup through the filter.
I only filtered it once, although one of the sites I read mentioned filtering it multiple times but did not mention why.
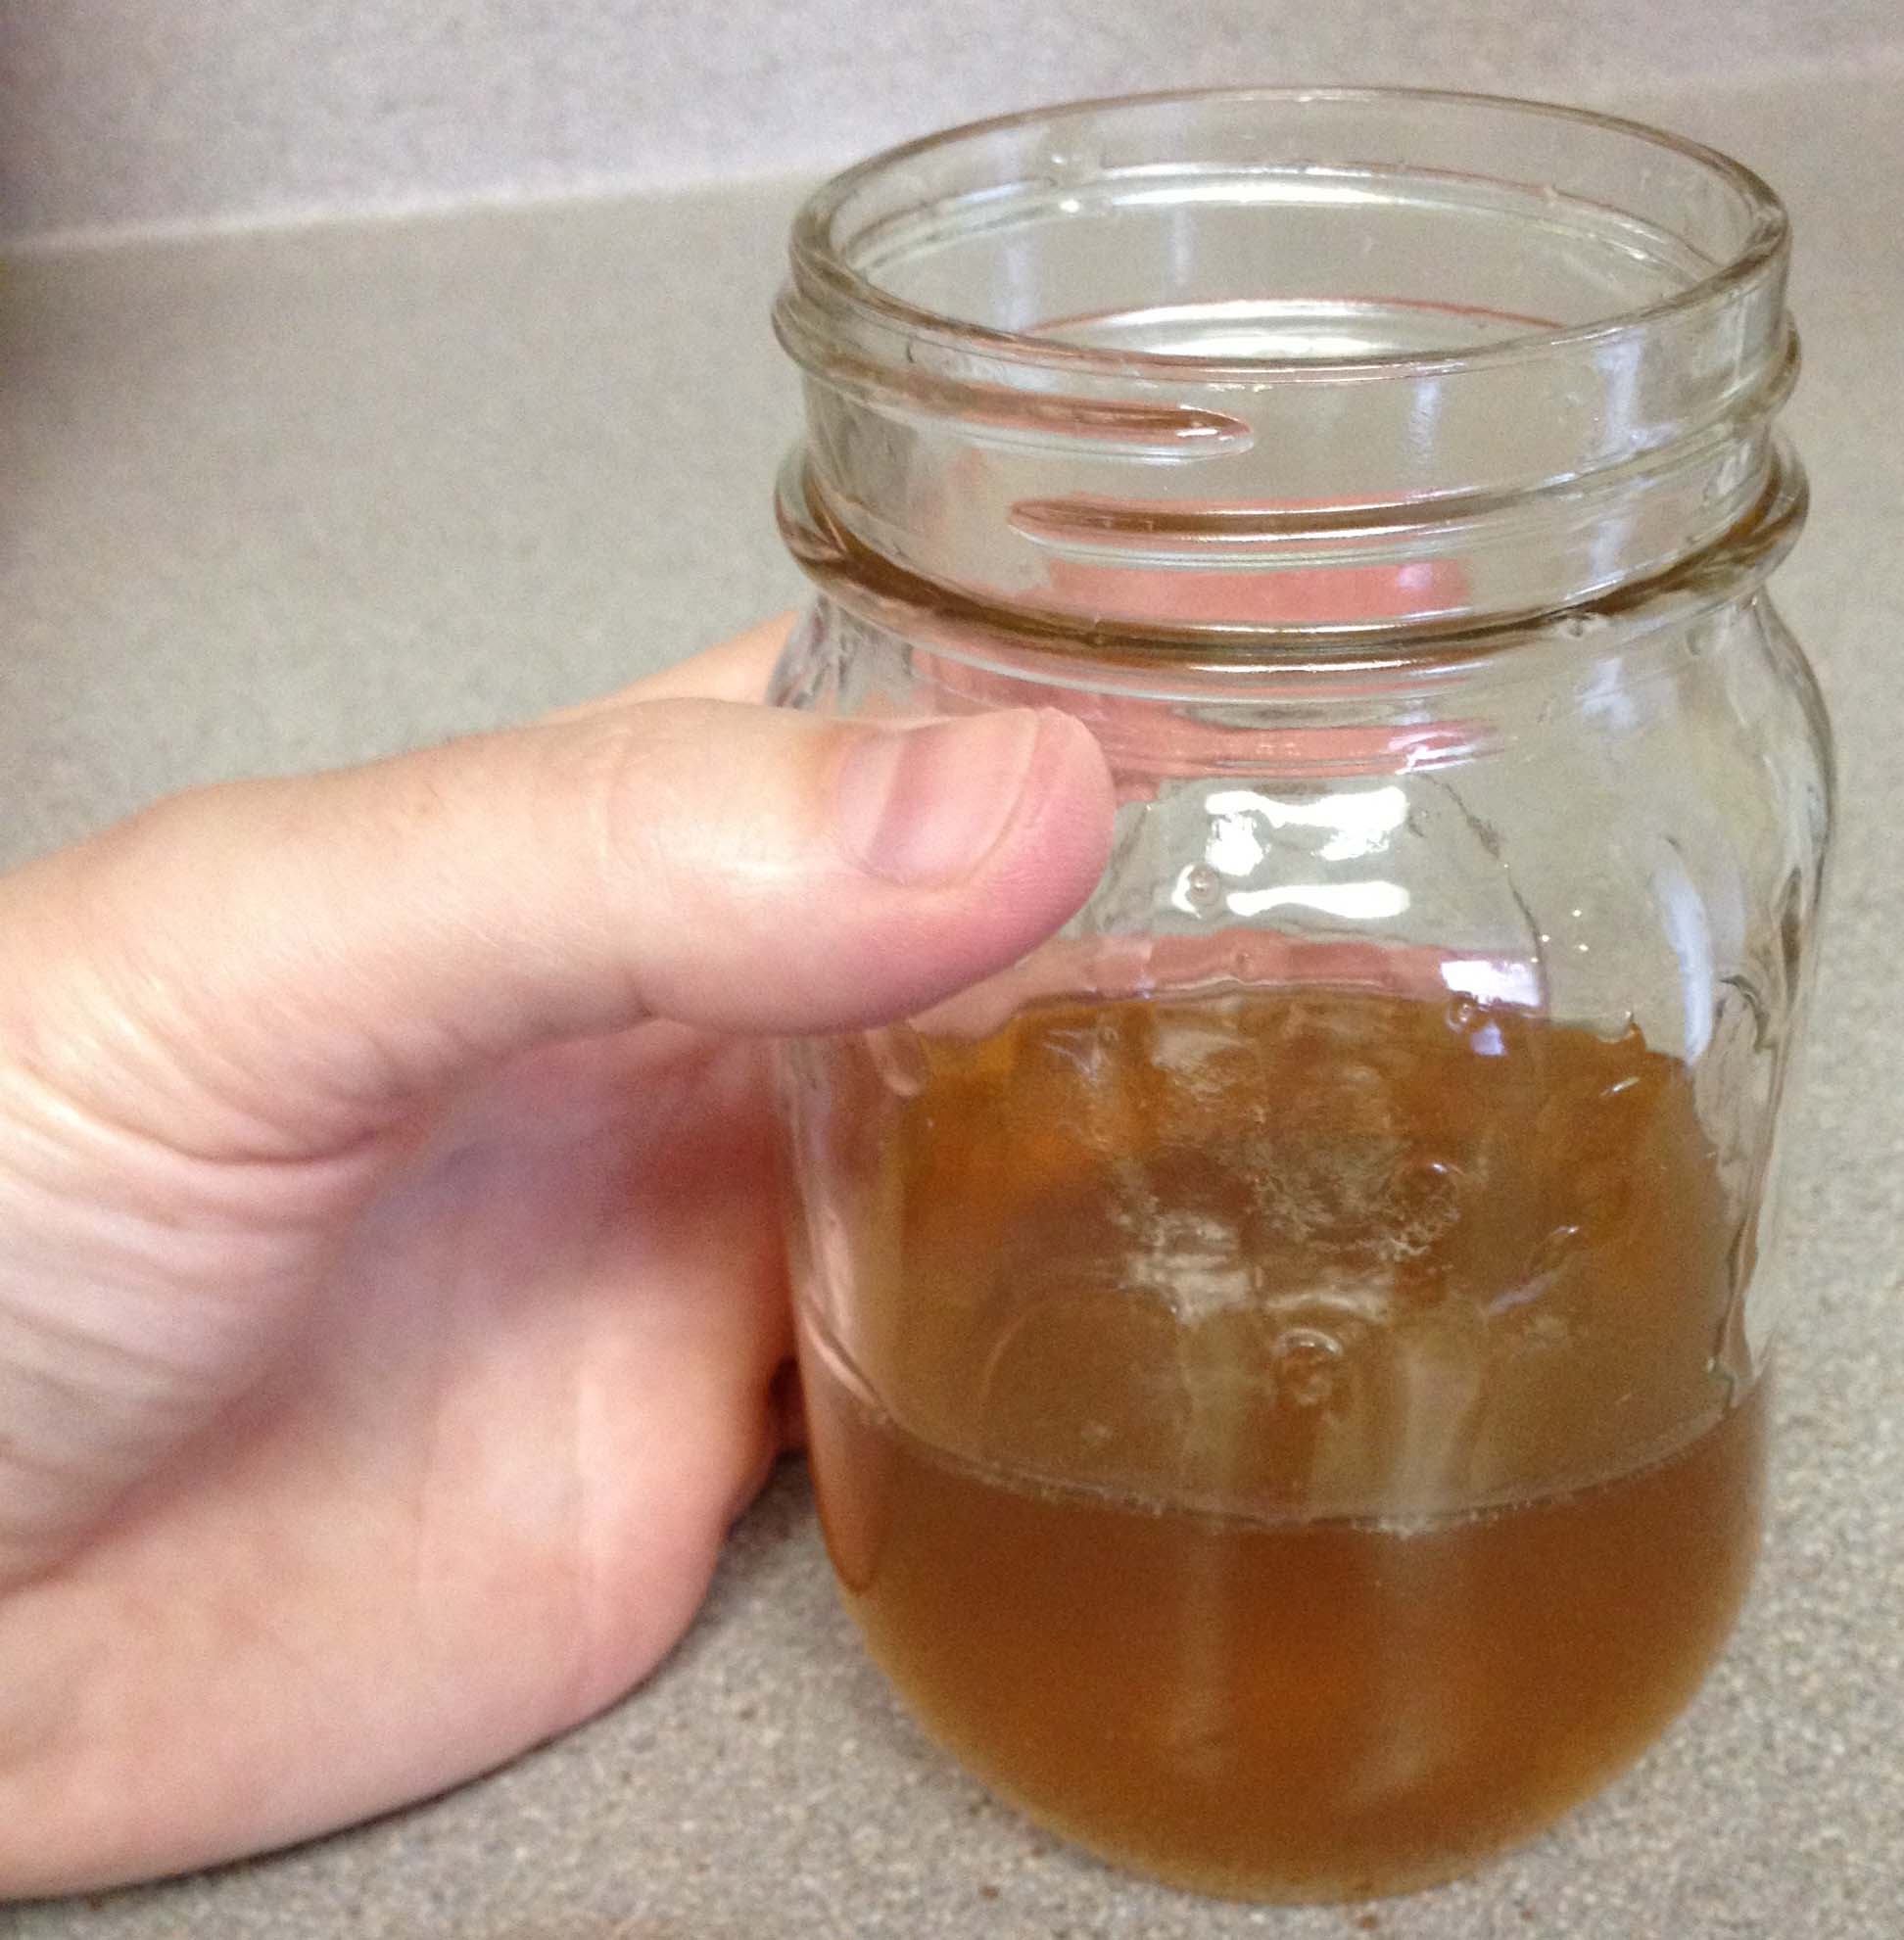
The 2-2.5 gallons of sap I started with netted about 1 C of syrup!
I hope this demystifies the maple syrup making process and helps you dive into your own syrup-making adventure!
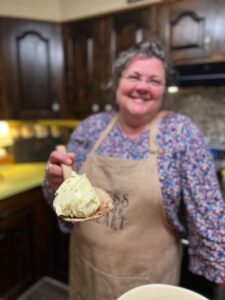
Molly Sotherden is a stained glass artisan from Ohio. She’s also game to try just about anything once.