Let’s talk about making yogurt at home and permanently tossing those expensive little sugar-laden cups of store-bought stuff.
Benefits of Homemade Yogurt
Why would we even want to make yogurt at home? Thirty-two ounces of good quality yogurt can cost almost as much as a pound of ground beef these days. However, we can make a quart or gallon of yogurt for just the cost of the milk. That’s a big savings!
The health benefits of consuming yogurt are enough to motivate most of us to take a few minutes to produce a product that will bring joy to our guts. Most inexpensive store-bought yogurt products are full of preservatives and thickeners that are completely unnecessary and unhealthy. Oh, that’s not to mention the high-sugar content! We have all heard that yogurt provides a heapful of probiotics but, did you know that yogurt holds many more benefits that may have been secretive to us until now? Its properties may help with chronic pain, blood pressure regulation and more. Sign me up!

Creating a batch of yogurt is not difficult and, quite honestly, aren’t we just plain satisfied when we can perfect a new skill right in our own home kitchens? Let’s take back those simpler-time skills which we have handed over to the food manufacturers. Making yogurt, like most time-honored skills, can most certainly be a family affair. The youngest two of our six children have been making yogurt since each was about six years old. The ease of homemade yogurt-making is a very well-kept secret that all should know. Grab a stock-pot, thermometer and some glass canning jars. Yogurt may also be produced easily in a pressure cooker, slow cooker, or affordable yogurt maker like this one that is super easy to use. The yogurt maker is great for smaller batches.
This time-honored skill is attainable for many folks who desire living a simpler life. I personally don’t have experience with goat’s or sheep’s milk yogurt but I have used many types of cow’s milk from raw to the most inexpensive store-bought milk.
And, here’s another secret….in my kitchen, our weekly batches of homemade yogurt are useful in many ways. The kids enjoy it with pure maple syrup and maybe chocolate chips, fruit or granola any time of the day. Sometimes I will find that one of them has made yogurt popsicles. I very often strain the yogurt to produce a thicker Greek-style yogurt or keep straining for a cheese similar to cream cheese. Just use cheesecloth or butter muslin, a large mesh strainer and a suitable bowl to catch the whey (which is very useful as well…maybe we’ll talk about that sometime soon!). If you are one who prefers a faster, less messy approach, go with this strainer which I have found works well, too!
On a regular basis, I reach for our homemade yogurt as a substitute for buttermilk in pancakes or Southern Cornbread. Using yogurt to thin down store-bought sour cream stretches the food dollar as well but it can substitute for sour cream in many cases, too! Yogurt may be used in bread-making, cake baking and in smoothies, of course.
Homemade yogurt has been living a secret life all this time with opportunities to help us save money, improve health, learn skills of old and bring families together in the kitchen. Now that we know some of its secrets, let’s make some yogurt. As I mentioned, all the various methods have pros and cons. This method can be used with or without electricity and doesn’t require special equipment. However, if this seems too daunting as you begin the journey of making yogurt, feel free to grab an easy-to-use yogurt maker. I own and use the EuroCuisine Automatic Yogurt Maker quite often and it seems to be fail-proof.
Homemade Yogurt Using Gas- or Electric-Heat Source
Equipment, all clean and sanitized:
- Stock-pot
- Long spoon or whisk
- Thermometer
- Milk, any amount
- 2 cup capacity glass bowl or measuring cup
- Plain yogurt from store or your last batch
- Wide-mouth funnel
- Ladle
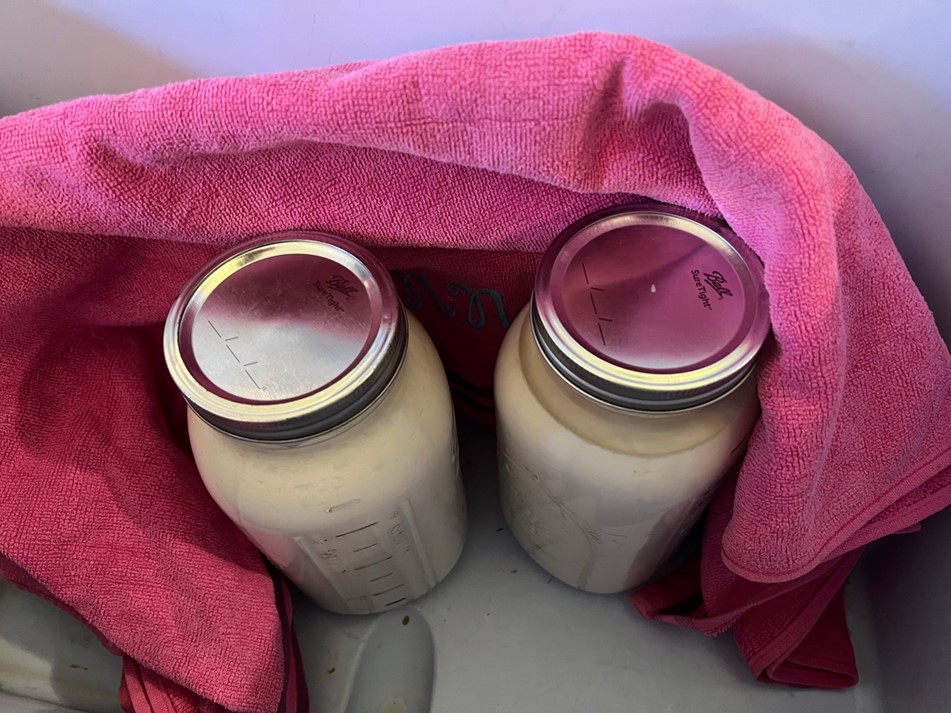
- Canning jars with lids
- Large towels
- Empty cooler (like used for camping)
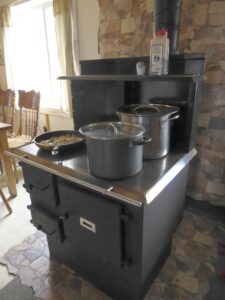
Add desired amount of milk to stock-pot. Move the milk with long-handled spoon or whisk to prevent scorching. Heat over gas or electric to 180F. Use a thermometer to monitor progress. It really doesn’t take long to heat so be watchful. Turn off heat and allow milk to cool to 110F.
Remove about one cup of milk into a bowl or measuring cup. If using a gallon of milk, add 6 ounces of store-bought or previous-batch yogurt to the cup of milk, stir well. Return mixture to remaining milk and stir well but don’t delay. The milk needs to retain heat.
Moving rather quickly, pour or ladle the milk-yogurt mixture into the canning jars and cover with lids. Place the jars in a cooler and place other jars of very warm water around the yogurt jars. Wrap a towel or two around the yogurt and close the cooler. Leave undisturbed for 8-18 hours. The longer the yogurt rests, the thicker and tangier it will be.
Watch our yogurt making video with Mrs. Katie to learn more.


Thank you
[…] Something like yogurt can be made easily with cow’s milk or goat’s milk as you use the whole milk. Just warming it and adding a starter culture is the start of homemade yogurt! […]